MP3 music files are highly popular among people due to their small size, flexibility, and portability.
Windows 10 not only natively supports MP3 music files but also contains two media players that can run them without any problem. This article teaches readers how to use these media players to add album art to MP3 files without making use of any external software. In case you’re looking for an automated, easy and reliable way to add album art to your songs, go for the Easy File Renamer (EFR) software. The software can also help you in renaming songs and changing their metadata. Download EFR here:
Add Album Art to MP3 Files in Windows 10
EFR is safe to use and gives users 100% control over their data
Solutions
Solution 1: Add Album Art through Windows Media Player
Changing or adding up Album Art is a very straightforward task in Windows Media Player. While you’re adding the Album Art, Media Player will automatically save the changes, and thus the next time album will show up the new Album Art.
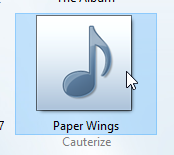
- Launch Windows Media Player and navigate to the Album section under Music.
- Find the album to which you wish to add/edit the album art.
- Search for the respective album art in Google.
- Save the image to your computer.
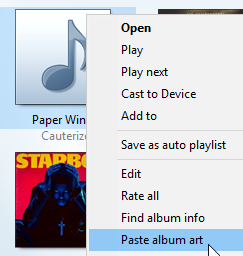
- Navigate to the location where you’ve saved the image, right-click it and select Copy to copy the album art via File Explorer (known as Windows Explorer in versions that preceded Windows 10).
- Navigate to the Album section in Windows Media Player and paste the copied album art on the preferred album.
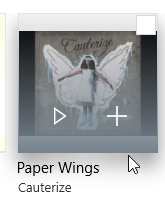
- Once the album art has been added to the album, it should look like this.
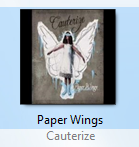
Album Art updated
Solution 2: Add Album Art through Groove
Groove is the default media player in the Store app of Windows 10. Since it’s a part of the Store, it only became available from Windows 8 onwards. Adding up album art to an album is quite simple in Groove just like it is in Windows Media Player, in fact it is even easier.
- Open up Groove and navigate to the Albums section.
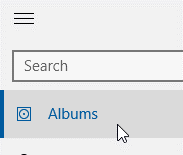
Albums section of Groove - Locate the album to which you wish to make a change / add an album art image.
- Right-click the album, and select Edit Info.
- Clicking on Edit Info will lead you to a new window where all the meta information of the album can be changed.
- Select the album art from File Explorer/ Windows Explorer (as applicable), and click Open to add it to the album. Next, click Save.
- Once the album art has been changed, the new image should be displayed in the Album section in Groove.

Warning: Undefined array key "author_box_bio_source" in /home1/clonefil/public_html/blog/wp-content/plugins/molongui-authorship/views/author-box/parts/html-bio.php on line 2
Raza Ali Kazmi works as an editor and technology content writer at Sorcim Technologies (Pvt) Ltd. He loves to pen down articles on a wide array of technology related topics and has also been diligently testing software solutions on Windows & Mac platforms. If you have any question about the content, you can message me or the company's support team.