Nextcloud is a client-server software which facilitates creating a file hosting service in which various kind of files can be stored. It’s comparable to Dropbox and Google Drive as far as functionality goes, however being free of cost and open source unlike the above mentioned gives it a huge shot in the arm. Since Nextcloud primarily runs on a server, a system with Internet access is mandatory to install the software.
Once the software has been installed, it can be accessed over the Internet or a Local Area Network (LAN) from the given client-side software programs that are available for free of charge. Since it’s just a file hosting service, chances are that it may produce duplicate files over time. This calls for effectively weeding out duplicate files from the server. This tutorial describes for the readers how they can remove duplicate files from Nextcloud. Below is a simple and effective method to tackle Nextcloud duplicates. Clone Files Checker is what they call it!
Clone Files Checker for Windows and Mac is a verified software
Compatible with Windows 10/ 8.1/ 8/ 7 and Mac OS 10.10 onwards
By clicking to download, you agree to these Terms
See Windows Features | Mac Features
Solution
We’re assuming that the user has already installed Nextcloud on a server.
- Visit the following web URL:
https://nextcloud.com/ - Click on Download in the top right corner of the webpage.
- In the Get Started section, locate Sync your data and download the appropriate client software. It provides a wide range of clients for various platforms. This tutorial mainly covers the Windows platform; hence the Windows version of the application will be downloaded.
- Once the software has been downloaded, install it. Make sure to check the Integration for Windows Explorer option as it allows users to access the Nextcloud file host through Windows Explorer.
- Launch Nextcloud and find the server address. This address depends on where the server software is installed, or the web domain to which the Nextcloud file host is assigned. This tutorial makes use of a popular free Nextcloud file host known as unixcorn, thus the server address would be https://cloud.unixcorn.org/. If it’s something else, use the appropriate domain in the given text field. If you can’t locate it, open the server software and click Settings. Now find WebDAV address which is, in fact, the address of the Nextcloud server.
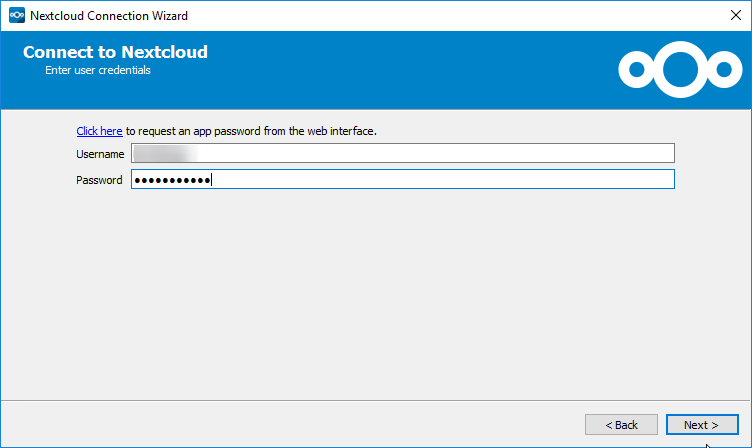
- Now enter in the login credentials of the Nextcloud user account.
- Select Sync everything from the server as well as Keep local data. Now click Connect in order to connect to the server to sync files.
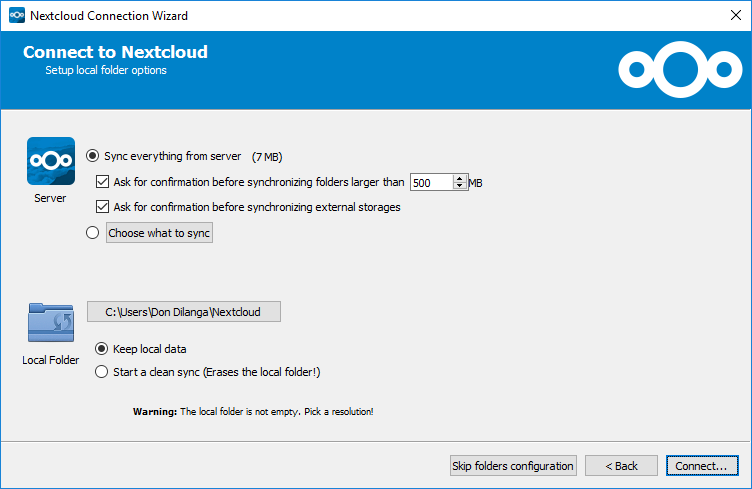
Select the relevant options and then click Connect - Select between Open Nextcloud in Browser or Open Local Folder. In this tutorial, we will choose the latter, as removing duplicate files is quite easy on this route.
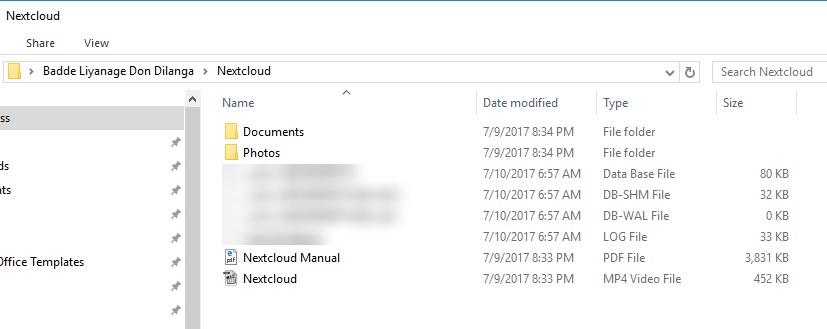
- You will be led to the following folder (see screenshot below). Typically, Nextcloud’s local storage is located at C:\Users\%userprofile%\Nextcloud
- Visit the Clone Files Checker website and download the setup file.
- Install the software and then reboot your computer.
- Now add the Nextcloud local folder (folder path stated in step # 9) as seen in the following screenshot in the Step 1 section.
- In the next step, select either All Files or specify the filetype(s) to be targeted during the scan. Click Start Search to set the scan into action.
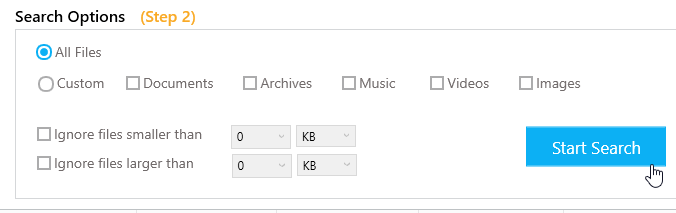
Selecting the filetype(s) and then initializing the scan - Once the scan results are out, select between Fix Wizard for quick removal, and Review & Fix to review the duplicates before taking an appropriate course of action.
- Now choose between keeping newest or oldest files by selecting the relevant option.
- Specify whether you wish to permanently delete the duplicates or move them to a separate folder.
- Click Continue to actually execute the course of action you selected in the last step.
- Once the duplicate files are removed successfully from your computer, the changes will be soon synced to the server’s end and reflected as soon as the whole process is over. The time taken to accomplish this process depends on the quantum of the duplicate files and/ or the Internet speed. The result can be seen in the Nextcloud application (Activity | Sync Protocol) as seen in the following screenshot. This section basically logs up all the changes made on the server’s end.

Activity log

Warning: Undefined array key "author_box_bio_source" in /home1/clonefil/public_html/blog/wp-content/plugins/molongui-authorship/views/author-box/parts/html-bio.php on line 2
Raza Ali Kazmi works as an editor and technology content writer at Sorcim Technologies (Pvt) Ltd. He loves to pen down articles on a wide array of technology related topics and has also been diligently testing software solutions on Windows & Mac platforms. If you have any question about the content, you can message me or the company's support team.