Internet giant Google is well known even among beginner level computer users due the huge number of services it offers. One such handy service offered by them is Google Drive which makes use of Google facilities to enable users to store files on the cloud. Uploading a file is quite simple with the given intuitive interface, but it can get a little trickier when it comes to looking for a certain file from the huge trove of data. The following lines demonstrate how to search and permanently delete pictures from Google Drive.
By the way, if duplicate pictures are what you’re looking to delete from your Google Drive, Cloud Duplicate Finder holds the key to it. This web-app is absolutely secure, does not install any add-on with it, and never snoops on your data. And it does its intended job of deleting ALL KINDS of duplicate files with deadly accuracy!
Solutions
Solution 1: Find and Remove Pictures Through the Desktop Client
This method doesn’t actually deletes pictures permanently out of GDrive, but transfers them to the trash. This method might be more useful if the images that are to be deleted might be required in the future.
- If Google Drive isn’t already installed in the system, please visit the following URL to download it:
https://www.google.com/drive/download/ - Pick the target platform, and then download it.
- Once the software is downloaded, install it in the system just like a regular software.
- Login to GDrive by typing in your Gmail credentials. You will notice it’s icon will appear in the notification area.
- Click on the icon and locate the Open Google Drive folder option. Click it to open the folder where all the synced data is stored.
- Right-click the Google Drive icon in File Explorer / Windows Explorer and select Properties from the context menu.
- Move the mouse a bit down, locate Advanced and click it.
- Switch to the Security tab.
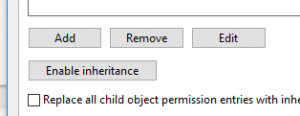
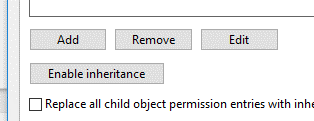
- Click the Advanced button to access the advanced security options.
- Click on Enable inheritance to inherit all the permissions from the parent folder, which is usually <System Drive>:\Users\%userprofile%\. With this option enabled, Google Drive will enjoy the same preferences as enjoyed by this particular folder (see step # 5), thereby allowing Windows Search to index its contents.
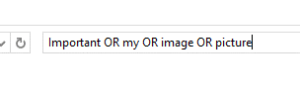
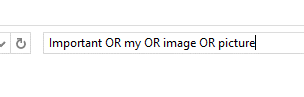
- Now start searching for the pictures in the Search Box in File Explorer / Windows Explorer. You can also use the OR / AND operators to find multiple pictures in one go.
- Highlight the pictures (click a picture, hold the Shift key and select the last picture to select all the pictures in between them).
- Now right-click anywhere on the highlighted area and select Delete to remove the pictures from the computer and as well from Google Drive once the sync gets done.
Solution 2: Find and Remove Pictures through the Web Interface
The web-based application provided by Google makes for another way you can browse through your data in Google Drive. Here is how you can make good use of it and remove pictures from GDrive.
- Visit the following web URL, enter in the login credentials of the Gmail account associated with Google Drive:
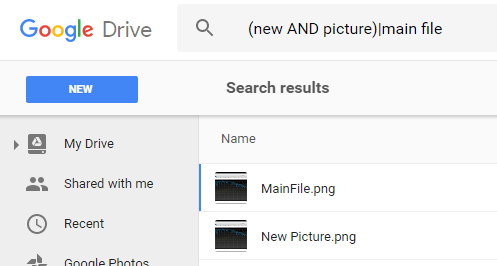
https://drive.google.com/drive/ - Now search for the images you wish to delete. Please remember that the | operator is used for OR and AND is used for AND. These tools aid you in looking up for multiple files in one go.keywordOne AND keywordTwo → will return the file named as keywordOne keywordTwo.
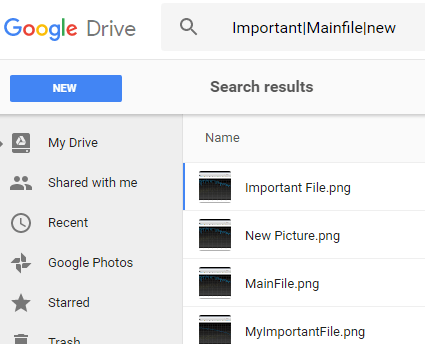
keywordOne | keywordTwo → will return both the files named keywordOne and keywordTwo.
(keywordOne AND keywordTwo) | keywordThree → will return both of the files named as keywordOne keywordTwo and keywordThree.


- To swiftly delete a selection of pictures, click on one picture and hold the Shift key. Now select the last picture that you wish to delete, as this will select all the pictures in between. Finally, press Del on the keyboard to delete all the selected pictures.
- Now click the Trash icon.
- Click on Trash to collapse its drop-down menu and select Empty trash to clean up its entire contents. Beware that removing any images/files through this method means they can never be recovered. Therefore, only do so if you are absolutely sure that you no longer need those images/files.
- If you need to find duplicate pictures in Google Drive, read this guide.

Warning: Undefined array key "author_box_bio_source" in /home1/clonefil/public_html/blog/wp-content/plugins/molongui-authorship/views/author-box/parts/html-bio.php on line 2
Raza Ali Kazmi works as an editor and technology content writer at Sorcim Technologies (Pvt) Ltd. He loves to pen down articles on a wide array of technology related topics and has also been diligently testing software solutions on Windows & Mac platforms. If you have any question about the content, you can message me or the company's support team.