There are 2 ways you can remove duplicate images in various formats: one is manual and the other is automatic using some duplicate image comparison and removal utility. If you’re short of time, try the second option and use Clone Files Checker to easily remove duplicate jpg, jpeg, gif and other image files.
Note: If you want to fix double extensions in filenames (e.g. Data.doc.doc, Notes.txt.txt), you can remove the extra extension by using Easy File Renamer. Use the Add Files button to add all the files you want to remove the extra extension from, and then select the Remove Text rule. Enter the text you want to remove in the Text field and select Remove First. Click Add Rule > Rename and then select Yes. You will now be seeing bulk renaming performed within seconds.
Easy File Renamer is available for Windows systems only and can be downloaded from https://www.easyfilerenamer.com/.


Clone Files Checker for Windows and Mac is a verified software
Compatible with Windows 10/ 8.1/ 8/ 7 and Mac OS 10.10 onwards
By clicking to download, you agree to these Terms
See Windows Features | Mac Features
Manually Removing Duplicate Images
This strategy involves some risk of accidentally deleting important image files. There may be tons of duplicate files on your PC so it won’t be that easy to review each image individually.
Checking Drive Indexing Settings
In order to manually remove duplicate images from your PC it is important to ensure drive indexing is turned on. Drive indexing service automatically indexes all files stored on selected drives. It thereby improves your experience with Windows Search. You get relevant and quick search results whenever drive indexing is periodically conducted. On the other hand, if this feature is turned off you may not be able to search relevant files.
1. Press Windows Key + X.
2. Select Search option.
3. Type “Indexing options” in Search Box.
4. Click Settings icon.
5. Open the keyword from Search Results.
6. Indexing Options dialog will open.
7. Click Modify button.
8. Click “Show all locations” button.
9. Make sure all drives are already checked under “Change selected locations” group.
10. Click OK | Close.
Searching and Deleting Duplicate Images
1. Double click Computer icon on your Desktop.
2. Open a drive that contains duplicate pictures. For example: drive D:\
3. Press F3 key to initialize Search.
4. Type the following keywords one by one in to Search Box located on top right corner:
- .jpg
- .jpeg
- .png
- .gif
5. After typing a keyword, you’ll get Search Results.
6. Press Ctrl + F1 keys simultaneously to expand the Ribbon, if it is minimized.
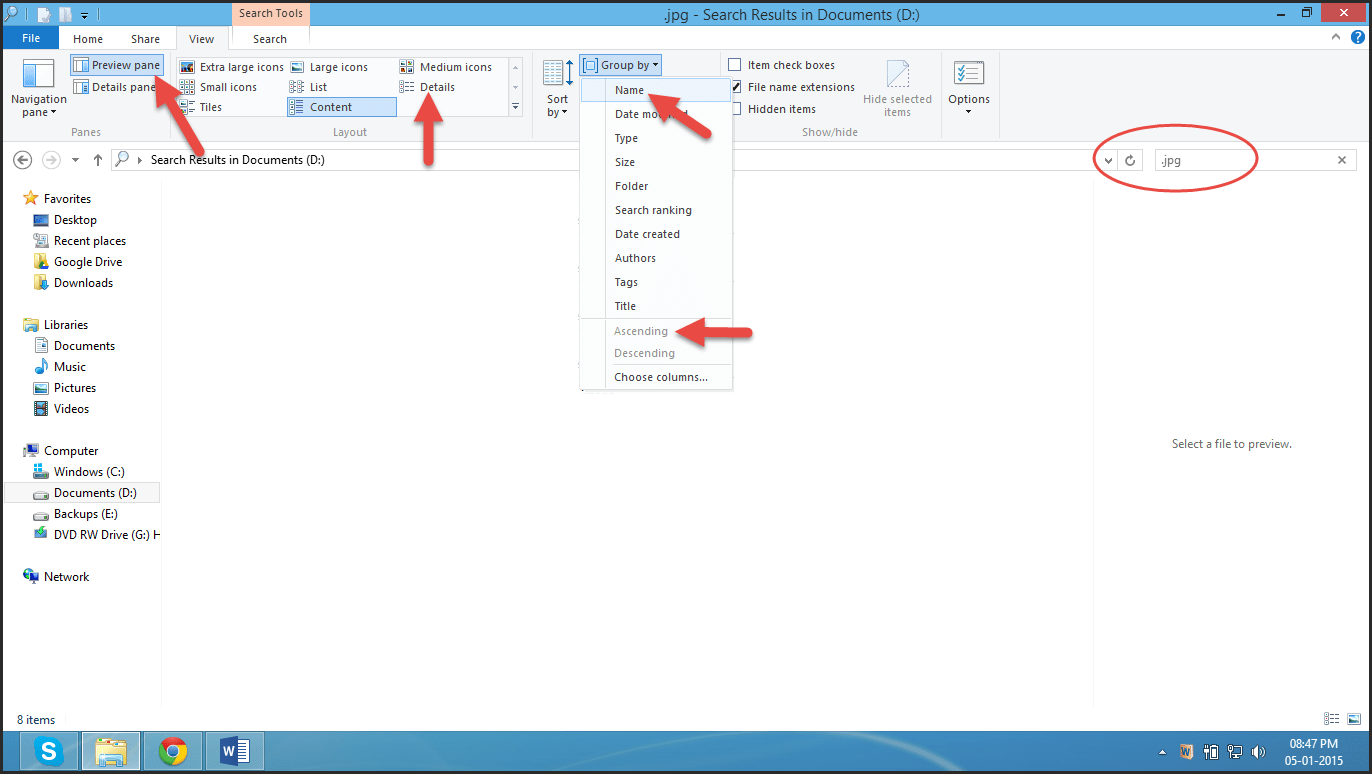
7. Click View tab.
8. Click “Preview Pane” icon under “Panes” category.
9. Click “Group by” icon under “Current view” category.
10. Select “Name” option from drop down menu of “Group by” icon.
11. Also make sure that “Ascending” option is selected in the same drop down box.
12. Click “Details” icon under “Layout” category in the same tab.
13. Now you’ll get all search results sorted and grouped name-wise in an ascending order along with file details such as name, date modified, type, size and parent folder.
14. Duplicate image files will appear side by side original image files.
15. Compare all image file previews to identify duplicates.
16. Select duplicate files:
- Ctrl + Click: Select any files in non-sequential manner.
- Shift + Click: Select files in sequence
17. Press Delete key of your keyboard to move them to Recycle Bin. Otherwise, move those files to a new folder to review them again and delete.
Using Clone Files Checker
The tool named Clone Files Checker automatically searches for duplicate images on your PC. You’ve to specify whether you want it to automatically delete them or you would review them and delete on your own. This is the safest and quickest option due to following reasons:
- Duplicate image files are backed-up automatically before deleting. You can restore them anytime, if you wish to do so.
- The scan process is quick and instant. It searches entire hard drive and removable media such as USB Flash Drive speedily.
- You won’t lose any file by accident. Advanced software algorithm ensures only duplicate images are deleted.
- If you’re hesitant to delete duplicate files, you can move them to a separate folder, or simply move them to the Recycle Bin.
- Scan history is recorded. You can export the same in a Text File (.txt).
- It supports variety of image files including .jpg, .jpeg, .png, .gif, and many more.
The Process
1. Download and install Clone Files Checker.
2. Add directories to scan.
3. Set filter options, choose which file types you want to be scanned. If you want only image files to be scanned, select “Custom” option and check-up the “Images” checkbox. If you want to scan all sorts of files, select “All Files” option.
4. In the same filter options, specify whether you want to exclude files smaller/ larger than certain sizes.
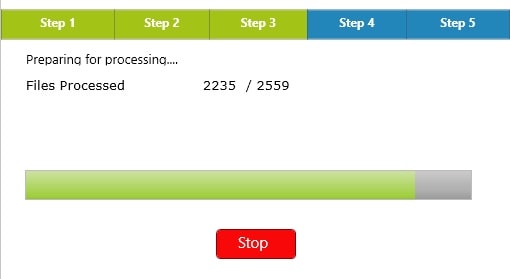
5. Start the scan process.
6. Use the Fix Wizard option to automatically delete all duplicates including JPG, JPEG, PNG and GIF images; or use “Review & Fix” to review the files before deleting.
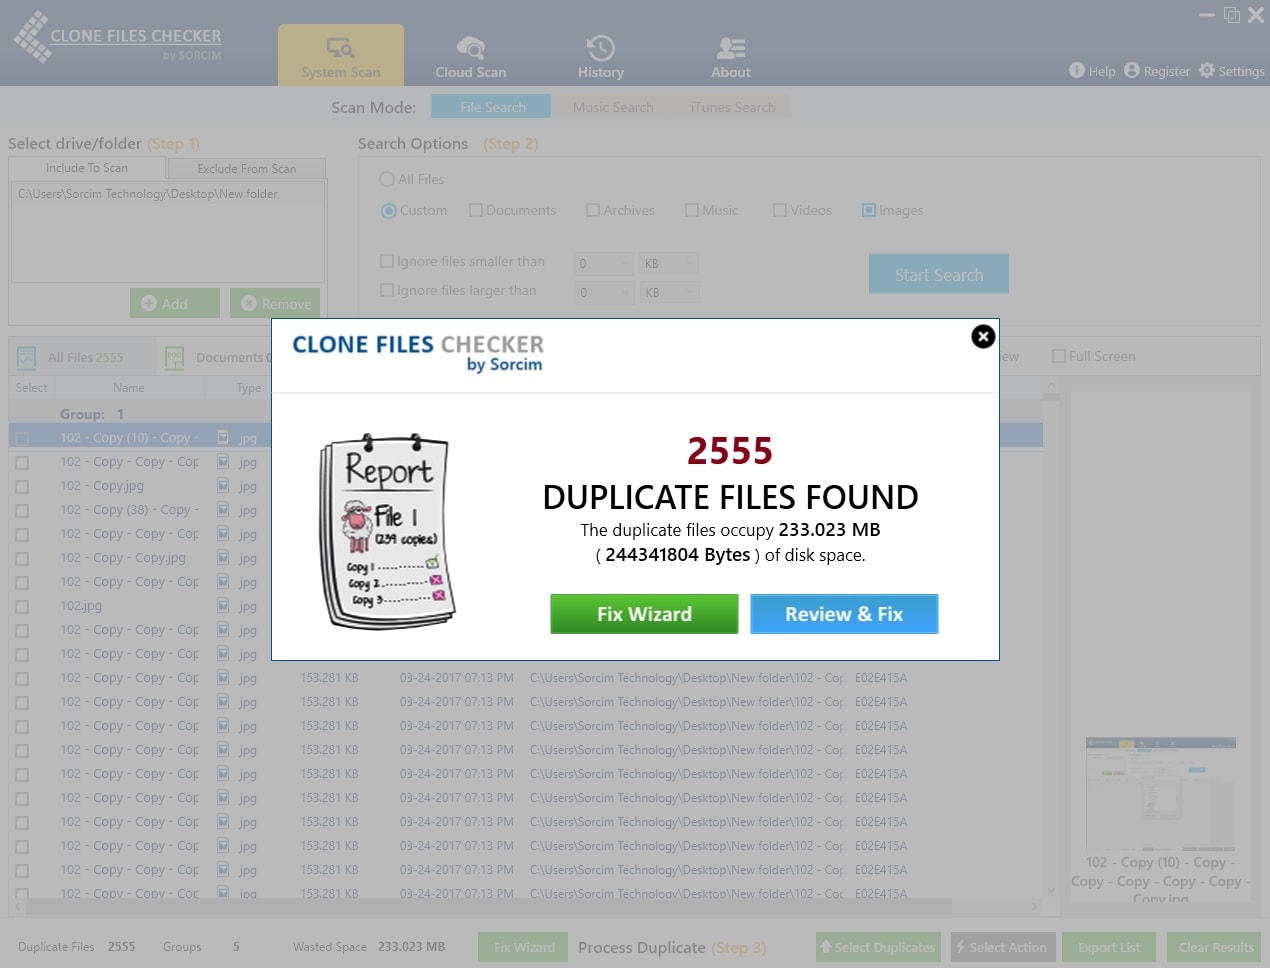
7. Take appropriate action- Delete permanently, move to Recycle Bin, or move to a new folder.
" data-author-type="
Warning: Undefined array key "type" in /home1/clonefil/public_html/blog/wp-content/plugins/molongui-authorship/views/author-box/html-layout.php on line 18
" data-author-archived="
Warning: Undefined array key "archived" in /home1/clonefil/public_html/blog/wp-content/plugins/molongui-authorship/views/author-box/html-layout.php on line 19
">
Warning: Undefined array key "id" in /home1/clonefil/public_html/blog/wp-content/plugins/molongui-authorship/views/author-box/html-layout.php on line 39
-"
Warning: Undefined array key "archive" in /home1/clonefil/public_html/blog/wp-content/plugins/molongui-authorship/views/author-box/html-layout.php on line 40
itemscope itemid="" itemtype="https://schema.org/Person" >
Warning: Undefined array key "img" in /home1/clonefil/public_html/blog/wp-content/plugins/molongui-authorship/views/author-box/parts/html-avatar.php on line 4
Warning: Undefined array key "show_social_web" in /home1/clonefil/public_html/blog/wp-content/plugins/molongui-authorship/views/author-box/parts/html-socialmedia.php on line 6
Warning: Undefined array key "show_social_mail" in /home1/clonefil/public_html/blog/wp-content/plugins/molongui-authorship/views/author-box/parts/html-socialmedia.php on line 7
Warning: Undefined array key "show_social_phone" in /home1/clonefil/public_html/blog/wp-content/plugins/molongui-authorship/views/author-box/parts/html-socialmedia.php on line 8
Warning: Undefined array key "type" in /home1/clonefil/public_html/blog/wp-content/plugins/molongui-authorship/views/author-box/parts/html-name.php on line 17
Warning: Undefined array key "type" in /home1/clonefil/public_html/blog/wp-content/plugins/molongui-authorship/views/author-box/parts/html-name.php on line 19
Warning: Undefined array key "type" in /home1/clonefil/public_html/blog/wp-content/plugins/molongui-authorship/views/author-box/parts/html-name.php on line 21
Warning: Undefined array key "archive" in /home1/clonefil/public_html/blog/wp-content/plugins/molongui-authorship/views/author-box/parts/html-name.php on line 37
Warning: Undefined array key "name" in /home1/clonefil/public_html/blog/wp-content/plugins/molongui-authorship/views/author-box/parts/html-name.php on line 41
Warning: Undefined array key "author_box_bio_source" in /home1/clonefil/public_html/blog/wp-content/plugins/molongui-authorship/views/author-box/parts/html-bio.php on line 2
Warning: Undefined array key "bio" in /home1/clonefil/public_html/blog/wp-content/plugins/molongui-authorship/views/author-box/parts/html-bio.php on line 8