Verizon Cloud is a widely used online cloud storage solution. As the company itself says, the service is something more than just backup. Numerous features offered by the Verizon have made it one of the best cloud solutions across the globe.
If you are a Verizon user, you probably store your important files and photos on the cloud for on the go access. Sometimes, you might have mistakenly uploaded the same files and images more than once, which results in a duplicate (or more) copies of the original file consuming your cloud storage allocation for no good.

Remove Verizon Duplicates From PC
Clone Files Checker Download (w/ Verisign Digital Certificate).
Compatible w/ Google Drive, Windows 10/8.1/8, Windows 7, Vista/XP.
By clicking to download, you agree to these Terms
See Features & Functions
If you have ever wondered how to remove duplicate files, photos and contacts from the Verizon cloud, we have the solution for you. Follow the simple methods given below to get rid of those duplicate files in your Verizon cloud account. It may take some time, but you will end up with data in a better shape!
Remove Duplicate Files and Photos using Verizon Cloud Application
Verizon cloud has a desktop application which can be used for managing the cloud account. You can easily use the application to find and remove duplicate files and photos in your Verizon cloud. To do so, follow the simple steps given below.
- Download Verizon cloud desktop application from their website.
- After downloading the application, install it by following the onscreen instructions. Once you reach the Backup method screen, choose the Back up your pictures, videos, music and documents folders option.
- Once the installation is complete, a taskbar icon will be automatically created from where you can manage your application.
- Now launch the desktop application and login by providing your credentials.
- It will bring up the Verizon cloud desktop application populated with your files on the cloud. There are 3 options to treat the duplicate files including contacts: 1- By replacing the local files with the Verizon Cloud hosted files, 2- By keeping the local files only & 3- By saving the both versions. You can choose whichever option that suits you.
- Now select all photos from the content view area and click the Download button or right-click and select Download to start downloading the photos to your computer. The photos will be downloaded to the Downloads folder in your computer.
- Repeat exactly the same steps for downloading any files by navigating to the Files view.
- Once the downloading gets completed, you will be notified by the app about it. Next, navigate to the Downloads folder in your computer and move all downloaded files (Photos and Files) to a single folder.
- Open the folder and click the View tab on the top bar of the window. Next, click on the Group by icon.
- Choose Name from the drop-down list to sort the contents alphabetically. This makes it a lot easier to detect any duplicates.
- Delete the duplicates.
- Optionally, you can create a Backup of your cloud account if needed. You can create backups either using the Taskbar icon or using the Desktop application.

Create a Backup - After creating the backup of your cloud, delete all of the existing files and photos from your Verizon cloud. Next, move all the duplicate free files from the folder where you had actually removed all the dupes to the Verizon desktop app. This will also sync all the change to the cloud and your cloud will be relieved of all dupes.

You will notice a contrasting difference in the amount of cloud space you were using before to what you’re utilizing now.
Remove Duplicate Files and Photos from Verizon cloud using Clone Files Checker Tool
If you want the duplicate cleanup in Verizon cloud performed with lightening speed as well as extreme precision, Clone Files Checker tool can help you. Follow the steps given below to do so:
- Follow the steps # 1-7 from the former method.
- Download and install Clone Files Checker.
- After the installation is complete, it will automatically add a duplicate files scan option to the context menu.
- Right-click on the folder where you have moved all downloaded files and select Scan with CloneFilesChecker.
- Now the Clone Files Checker window will pop up.
- Set All Files under search options.
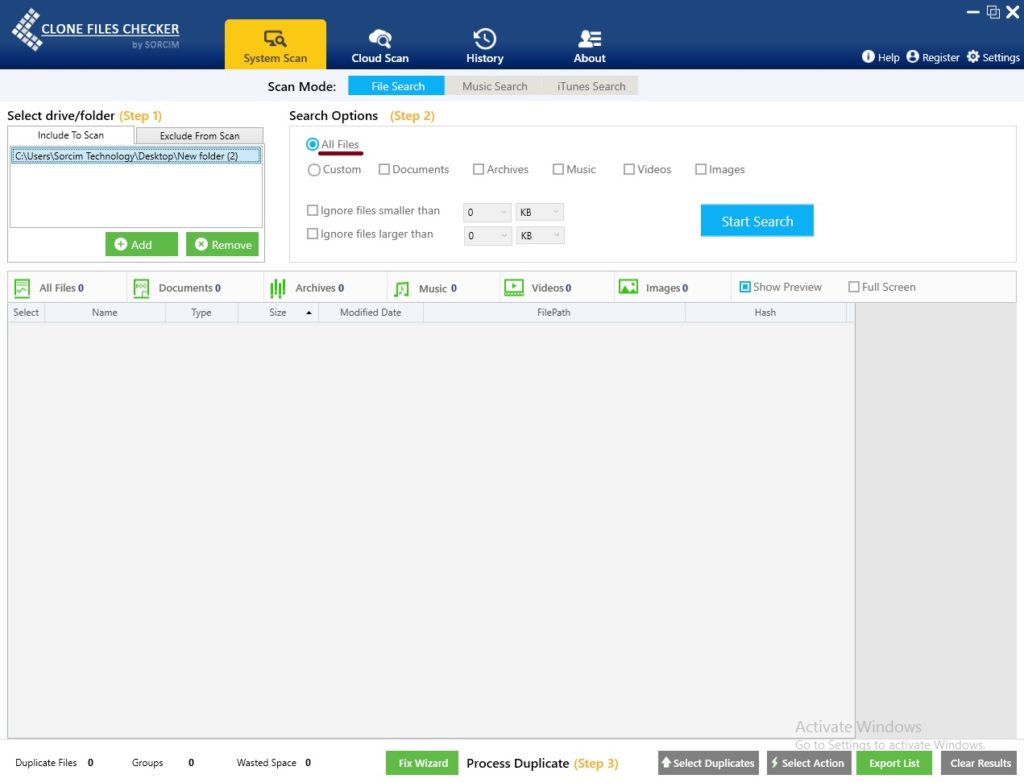
Select All Files - Click on Start Scan to launch the duplicate detection process.
- Once the scan is over, you will be given two options namely Quick Fix to find and delete the duplicates in one go and Review & Fix to manually inspect them before deletion.
- Select the appropriate option and finish the process. Once the cleanup is over, the duplicates will be gone. And very soon they will disappear from the cloud a well once your computer syncs the changes with it.

Conclusion
Following the above methods might help you to remove duplicate files and photos from your Verizon cloud. Don’t carry these unnecessary duplicates with you and make the maximum of the space in your Verizon cloud account.

Warning: Undefined array key "author_box_bio_source" in /home1/clonefil/public_html/blog/wp-content/plugins/molongui-authorship/views/author-box/parts/html-bio.php on line 2
Raza Ali Kazmi works as an editor and technology content writer at Sorcim Technologies (Pvt) Ltd. He loves to pen down articles on a wide array of technology related topics and has also been diligently testing software solutions on Windows & Mac platforms. If you have any question about the content, you can message me or the company's support team.