Windows 10 keeps restarting repeatedly for several times due to critical state of system files and settings. You need to fix this problem immediately to avoid system damages. It is wise to clean and repair corrupted registry entries of the operating system through a reputed registry cleaning software.
Windows Update KB3074681 appears to be crashing File Explorer (formerly called as, Windows Explorer). A computer tends to crash while attempting to turn off a network adapter or during other activities.
1. In the Search Box on Taskbar, type “View installed updates”
2. Open that from Search Results.
3. This opens up a new window- Installed Updates. Type “KB3074681” in Search box on upper right corner of you screen.
5. Follow the on-screen instructions and reboot.
Using Registry Editor to delete the profile list ID as it may be misconfigured.
1. Press Windows Key + R; type “RegEdit” and click OK.
2. This opens up Registry Editor program. Locate following sub key:
3. Delete a string named as “ProfileImagePath”
4. Exit out of the screen; reboot your PC.
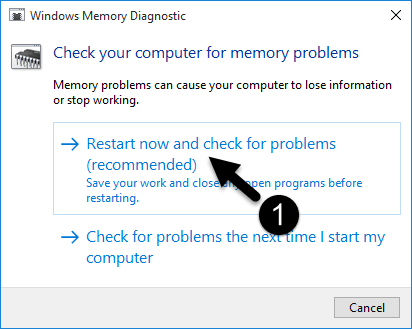
Check for issues related to computer memory. Use Windows Memory Diagnostic tool.
1. In the Search Box on Taskbar, type “Windows Memory Diagnostic”
2. Open that keyword from Search Results.
3. Click “Restart now and check for problems” button.
Hard drives get messy after prolonged use. You copy & download huge chunks of data and forget them. This results into insufficient disk space. The operating system fails to process temporary contents and Windows 10 starts restarting all the time.
1. Right-click a drive in This PC application.
2. Select Properties.
3. Click Disk CleanUp button under General tab.
4. Follow the on-screen instructions.
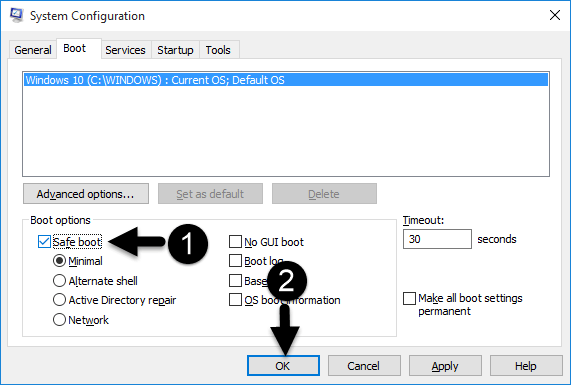
If you’ve noticed, in earlier versions of Windows, pressing F8 key would boot you into safe mode. However, these old ways of booting are no longer supported in Windows 8/ 8.1 and the same is true for Windows 10 too. Let’s take a closer look at the safe mode process for Windows 10.
1. Open up Run dialog box. Press Windows Key + R.
2. Type “msconfig”, click OK.
3. This opens up System Configuration program. Click Boot tab.
4. Check-up “Safe boot” checkbox, and then click OK.
5. Restart your PC when you’re prompted to do so.
Google Photos and OneDrive Business are prominent players in the realm of cloud migration. Both…
Are you running out of computer storage space because it is loaded with duplicate files?…
Hypervisor-protected code integrity, simply known as Memory Integrity in Windows 11, is used to shield…
The 1040-X is also known as the Amended U.S. Individual U.S. Income Tax Return form.…
Accountants manage tax return files as one of their services, and if they have many…
Whether music is your biggest passion or you only hear it from time to time,…