Transferring files and organizing them smartly isn’t a no-brainer job. It takes time as well as a lot of attention. We are sharing some ideas about how to transfer mammoth files without the risk involved and how to trim your PC’s data by deleting the duplicate versions of data-consuming files.
Compress the File
By file compression, tech guys mean reducing its size. This process makes it easy to transfer files at faster speed. This process actually reduces redundancy in the code of the file. Ultimately, the file becomes much smaller than its original size.
Compressing Files in Microsoft Windows
Download a File Compressor software which comes up with several archive formats such as, Zip, RAR, ISO, and so on. It is important to note that the recipient should have a compatible program which supports that particular file type. Zip, RAR and ISO are three most popular archive types.
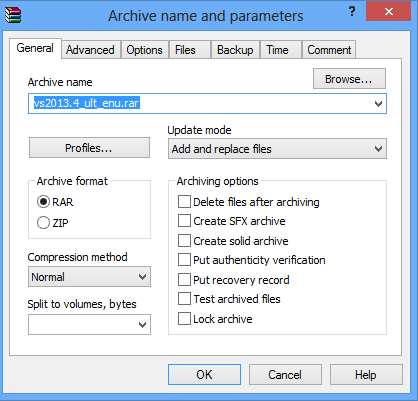
1. Download a File Compressor software, such as, WinZip, WinRAR, Free 7 Zip File Manager.
2. Install the program and drag and drop the files you would like to compress. You can use the toolbars as well.
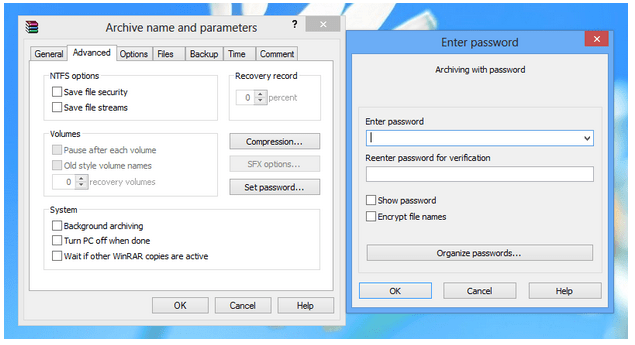
3. In the subsequent dialog, select a preferred compression level. Higher the compression level lower will be the processed file size, and vice versa. In some cases, the recipient’s program may fail to open file with extreme compression if he uses a different program other than yours.
4. Most file compressor programs have an option to split the file into several volumes comprising of several MBs or GBs.
5. The update mode lets you automatically synchronize the archive contents, i.e. the process of updating the archive files as soon as the content of original file is changed. Obviously, it’s up to you whether to enable or disable the automatic synchronization based upon your needs and requirements.
Benefits of Compressing the Files:
Compressing Files in Mac OSX
There is really no need for Mac users to rely on highly expensive file compressor software. Well, Mac OSX has built-in features that let you compress large files without needing to download external software. You can anytime uncompress or simply call, unzip the file with the same feature.
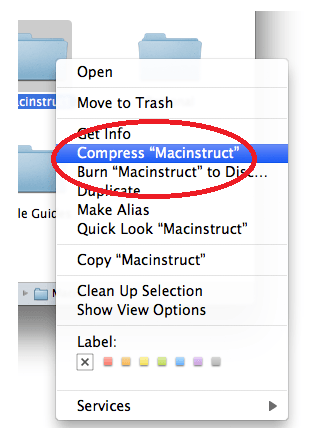
1. Go to the root directory containing the file/ folder that you would like to compress.
2. Select multiple files and folders by pressing and holding down the Shift key of your keyboard while making selection.
3. Right click on the selection, and select “Compress” option. For single file, you may find “Compress <FileName>” option.
4. The file(s) compression process should start instantly. This may take some time depending on the size of your files, the number of files selected, and so on.
5. Once you’re done compressing the files, you’ll see a nice little Zip File.
Split the File
To split means to separate into parts or portions. Divide the file into multiple parts to send them through email. The size of these fragmented parts will be much smaller and they’ll be quickly uploaded to the company’s server. Suppose, you’ve a file of 250 MB, you may divide the file into 25 parts each occupying 10 MB. Fragmenting a large file into multiple portions will surely work- although it may take lot of your time.
Save the File on Cloud
Cloud is a term that refers to online storage. It makes sense to store big files on the cloud online storage servers and email the file link to the recipient.
Benefits
How does Cloud Storage Works for Sharing Large Files?
The cloud storage works in two ways:
1. You may go to the service provider’s website, create a new folder and upload your files over there.
2. Alternatively, you may download and install their Synchronization program and add multiple files using a simplified Drag and Drop Interface.
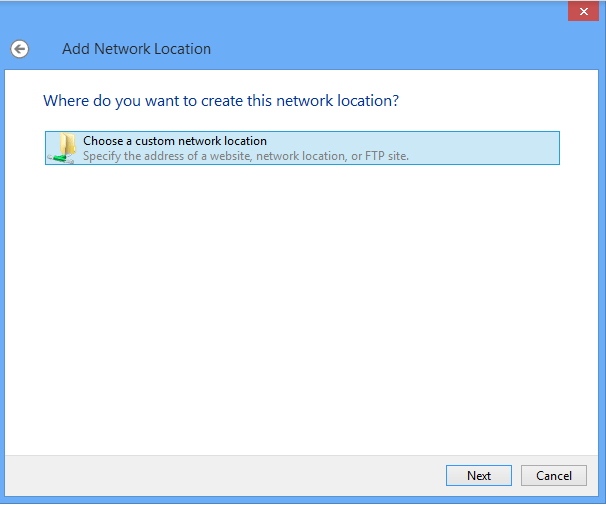
3. You can add a Network Drive. Double click the Computer desktop icon. Right click an empty area, select “Add a network location”. Follow the wizard your own. Provide all the details shared by your Hosting Company. Do NOT share your password.
You’ll be asked whether you want the files to be automatically synchronized when the original files are modified. Enable or disable that feature depending upon your needs.
Clean Duplicates
If you’re planning to send files over the email, you must check for duplicate contents in order to save your time, space and network bandwidth.
Benefits of Cleaning Duplicates
How does it works?
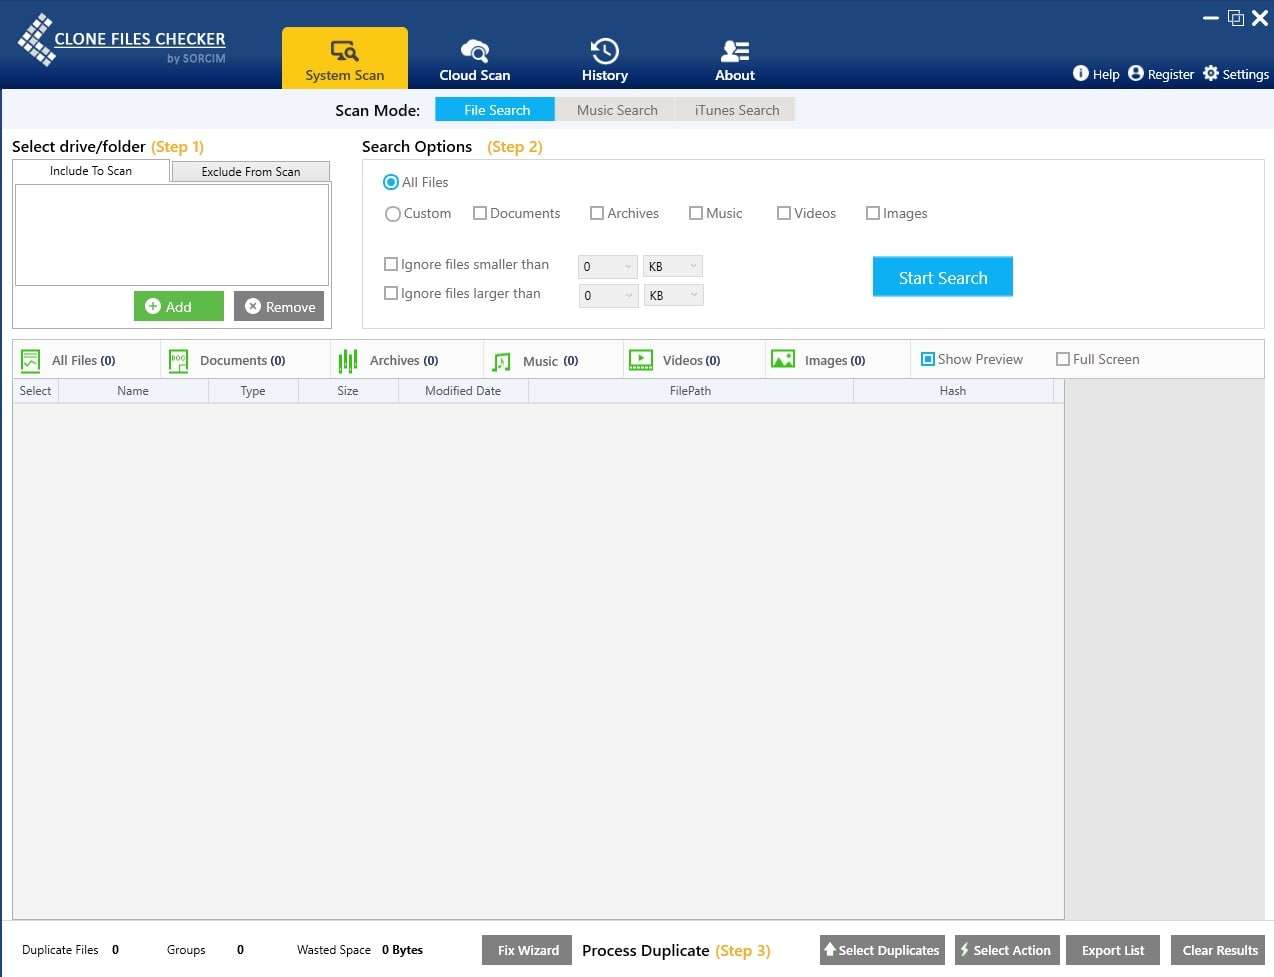
1. Download Clone Files Checker.
2. Install the program and run it.
3. Numerous duplicate files such as documents, images, music, videos, archive files, could exist. Make sure proper Filter Settings are applied.
4. You may choose which file types to be scanned
5. Add the directories you want to scan.
6, Perform the scan.
7. The list of all duplicates will appear in the main screen in a listbox.
8. Delete the cloned files in order to trim data in your PC.
Hypervisor-protected code integrity, simply known as Memory Integrity in Windows 11, is used to shield…
The 1040-X is also known as the Amended U.S. Individual U.S. Income Tax Return form.…
Accountants manage tax return files as one of their services, and if they have many…
Whether music is your biggest passion or you only hear it from time to time,…
Both Google Photos and OneDrive are one of the biggest and most popular online cloud…
Google Photos is a single place to store all your photos, sync, and share them…