The MacBook is a pretty expensive machine. It is not just a choice of the elites, it also attracts the tech-savvy to an equal measure. Mac systems are the first choice of users in need of optimizing their efficiency, and they are indeed high powered machines that come good on the task.
However, this does not mean a Mac system won’t suffer from performance dropouts if the user doesn’t pays attention to this aspect. If these issues are left unchecked, they can lead to a big mess. One such issue that needs to be kept in check is the duplications of data.
Duplicate files are affecting computers with every passing day. As the average user spends longer periods of time on the Mac performing various tasks, the odds of duplicate files stacking up on the SSD increase drastically. This issue must be fixed at the earliest for the benefit of users.
Clone Files Checker provides a very efficient solution to duplicates of all kinds. Be it a document, a video, an image, or any other filetype, CFC will detect the duplicates and let you decide whether you want to delete them simply, or backup them to a separate folder.
Clone Files Checker does not take file names into regard while scanning for duplicates. It instead employs a very sophisticated mechanism, known as the MD5 Hash technology. CFC directly scans the content of each and every file and compares the content with all the remaining files to determine which of them are duplicates. When you compare this method of comparing duplicates with looking for duplicates simply by glancing at the filename, you get to know which of these is the more comprehensive method.
So next time you want to scan deep inside a directory for duplicates, you can happily trust CFC. It will scan deep inside the directory no matter how big the folder hierarchy is, and gather perfect results at all times!
CFC leaves it to the user whether they want to scan for duplicate files of all kinds or if they’re more interested in checking out, for instance, the duplicate songs on their Mac SSD.
Once the scan is over, the gets to choose various criteria through which they can signal which files they want to retain. The others, will either be purged or moved to a folder, as the user desires.
This was the whole process described in just about ample detail. Now let’s look at it in a step-by-step style along with images.
The Duplicate Cleanup
Download the .dmg file of Clone Files Checker from its website and install it. Now follow these steps.
- Launch Clone Files Checker. Its interface looks like this.
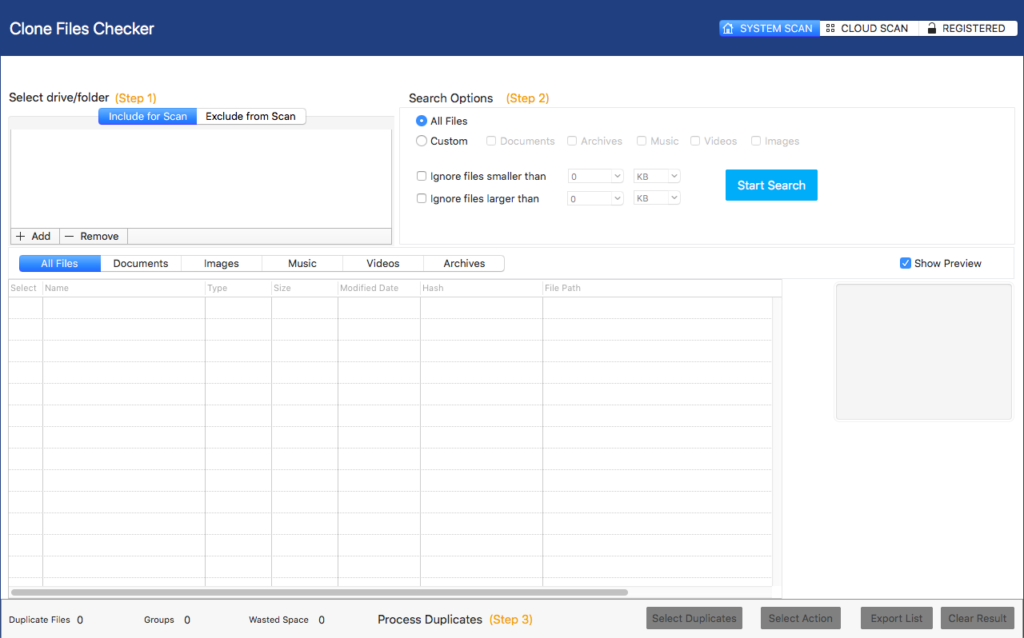
CFC user interface
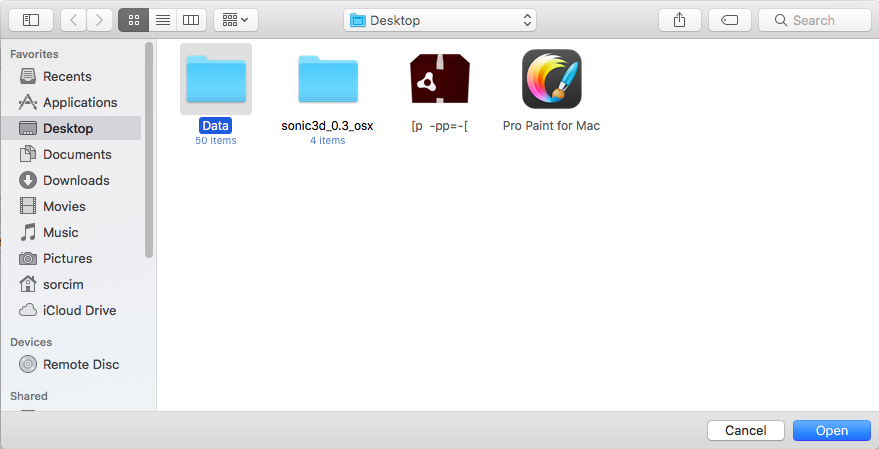
- Click the Add button under the Include for Scan tab to add the directory you want to scan for duplicates. Click the directory/ folder to select it and click Open to add it for the scan.
Note: In case you want to omit any folders (which are located inside the root folder) from the scan, select the Exclude from Scan tab and click Add to add any folders by exactly the same way as you added the folder for the scan.
- Click Start Search to launch the scan. You can indulge in some reading or treat yourself to some hot coffee while CFC does the trick.
- When the scan is over, you will be shown a pop up that gives out the summarized scan results. Click on REVIEW & FIX to open up the scan results.
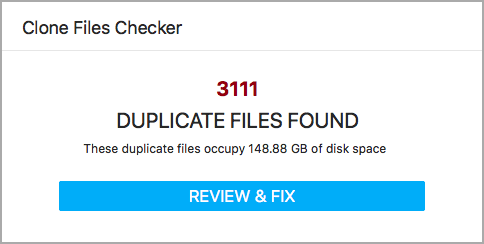
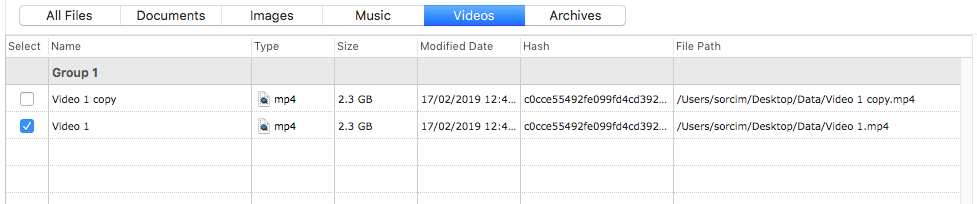
Scan results
- The results will now be laid out in groups. A single duplicate group contains the original file plus all duplicates, that have been detected during the scan.
You can select the Show Preview checkbox and click on an image to view its preview in the extreme-right of the Clone Files Checker user interface. This saves you from the effort and time required to open up the images from the Finder.
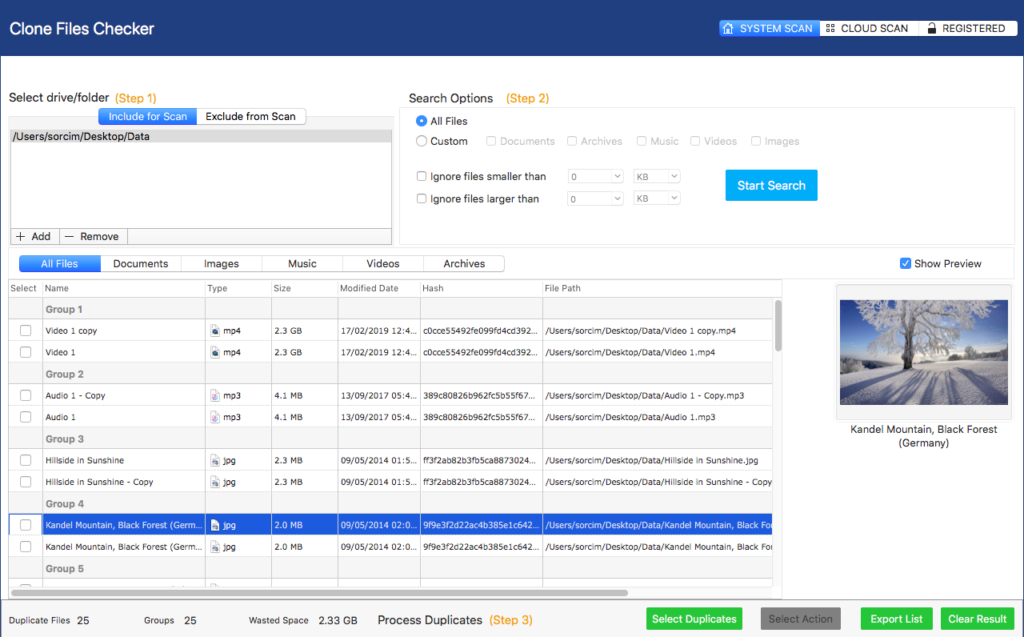
- The scan results are divided into different tabs for your ease, namely All Files, Documents, Images, Music, Videos & Archives. You can select a tab to view items that relate to that tab.
- Now you have to select the duplicates which will be retained. You can do so manually, but this isn’t a practical option if a big number of duplicates are involved. So you can click the Select Duplicates button and select an option of your choice. A single file from each group will be retained (in most cases), and all the remaining ones will be selected for further action.
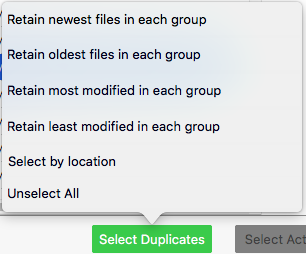
Selecting the criteria to retain files
- The final step provides you with the option of deciding between purging the duplicates or backing them up to a folder of your choice.
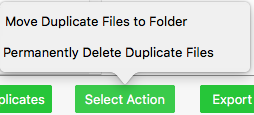
The final step!
- You can easily specify which folder you want the duplicates moved to. Simply click Clone Files Checker and select Preferences. The Folder to move duplicates field in this window shows the location of the folder which is currently selected for this job. You can easily click Browse and select a folder of your choice.

That’s it. Working with Clone Files Checker is very easy. Whenever you’re faced with a duplicate data scenario of any kind, you can trust CFC with doing the job for you. Cheers.

Warning: Undefined array key "author_box_bio_source" in /home1/clonefil/public_html/blog/wp-content/plugins/molongui-authorship/views/author-box/parts/html-bio.php on line 2
Raza Ali Kazmi works as an editor and technology content writer at Sorcim Technologies (Pvt) Ltd. He loves to pen down articles on a wide array of technology related topics and has also been diligently testing software solutions on Windows & Mac platforms. If you have any question about the content, you can message me or the company's support team.