Apple computers are well known for being a high end, expensive line of products. However, even with a handsome price tag, the storage capacity of many Apple computers is relatively small compared to their Windows counterparts. If the available storage space is not utilized properly, the user risks running out of space soon enough. This guide demonstrates how to optimize the storage and gain maximum advantage out of the available space.
Solution 1: Storage Management Option
- Click on the Apple logo located at the left corner in the menu bar, and then click About This Mac.
- In the next window, select the Storage tab.
- Now click the Manage button.
- Now follow the instructions provided in these options to clean out the local hard drive.
1.1 Use iCloud
People are gradually, but at an increasing pace, migrating to the cloud. Storing data in the cloud offers many advantages. It is highly secure, fast, and the biggest of them all, can be accessed from any corner of the world simply by using an Internet connection.
All the latest Mac operating systems are coupled with Apple’s official cloud storage service, known as iCloud. It provides a safe and absolutely secure medium to store, share, and retrieve photos, documents, messages and all kinds of files. Use the following instructions to use iCloud with ease.
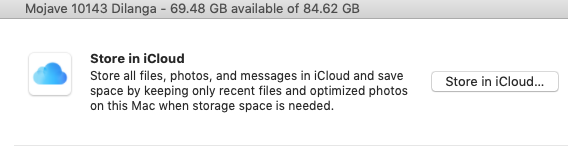
- The Manage button clicked a while ago will open a window that will comprise of multiple options. Locate the Store in iCloud button and click it.
- The window that opens up will ask you about what types of data you want to save in iCloud. It will provide 3 options, namely Desktop and Documents, Photos, and Messages. Now click on Store in iCloud to initiate the data upload to iCloud. Please note that storing Documents or Messages in iCloud doesn’t drastically clear out the local hard drive, storing Photos significantly frees up a lot of space. This is because iCloud stores the higher resolution version of the Photos in the Cloud while leaving their compressed version in the local file system for quick access. An active Internet connection is required to access the high-resolution version of the images.
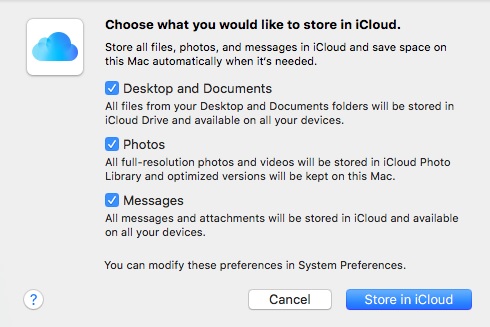
Choose what to store on iCloud
1.2 Optimize Storage
iTunes is a media management software and is widely used by both Apple and Windows users alike. Besides playing the usual audio files, it also makes playing Movies, and TV shows a very simple job. Whenever a media file is being played, iTunes automatically downloads media content to eliminate the buffering. On the flip side, the downloaded content sits in the local hard drive and increases in size in no time. This is why it is important to remove unnecessary media files on a frequent basis to free up storage space.
- Click the Optimize button under the Optimize Storage to clean up the hard disk by purging iTunes movies and TV shows. Once the cleanup has been performed, this button changes to Completed, as seen in the following screenshot.

1.3 Empty the Trash Automatically
Whenever a file is removed from the Mac, it is moved to the Trash instead of being deleted for good from the file system. This provides a bail out option just in case the user deleted something by mistake, but it also increases the utilization of the hard drive. Use the following steps to eliminate such problems with ease.
- Click the Turn On button for the Empty Trash Automatically section to automatically clean the trash once every 30 days. This method completely eliminates the manual input required to remove files permanently from the system. The user gets a good 30 days to decide if they want to recover a file as well.

Opting to empty the Trash after every 30 days
Solution 2: Use Clone Files Checker
The macOS is a robust operating system, comprising of a number of sophisticated inbuilt features that provide it with the edge to be a firm favorite. On the other hand, it lacks certain essential features, which leave users with no option other than turn to third-party applications. One such case is the presence of duplicate files. These files could be images, documents, archive files etc, and they can quickly occupy a significant chunk of the hard drive space.
Clone Files Checker performs the entire job of scanning and deleting files in a very efficient manner. It provides a comprehensive solution to deal with duplicates, without burdening the user with too many options. The whole job is performed in 3 easy steps and the user stands to free up a handsome amount of storage space. Let’s see in some detail how the whole job is performed.
- Download Clone Files Checker Duplicate Finder for macOS System.
- Initiate the setup file named cfc_mac.dmg and extract Clone Files Checker to the Applications folder.
- Now launch Clone Files Checker from the Applications folder.
- Navigate to the Step 1 section, and select the folder/ folders you want to scan for duplicate files. If there are any subfolders you want to exclude from the scan, they must be added in the Exclude from Scan tab.
- Proceed to Step 2 and select the file type filters as well as file size filters. Please remember that these steps are totally optional, and can be safely ignored without compromising the integrity of the scan.

Customizing the scan
- Click Start Search to kickstart the scan.
- You will get a pop up detailing the number of duplicates found, as well as the storage space they are eating up. Click the REVIEW & FIX button.
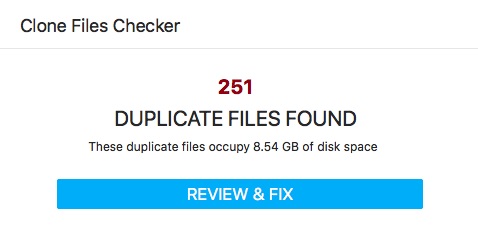
The Scan results will always be like this
- Now the detected duplicate files will be listed out along with the basic metadata for each file. Files are divided into groups with each group containing files that correspond to each other.
- The footer displays the number of duplicate files, the number of duplicate groups, and the wasted space.
- Click the Select Duplicates button and select the criterion for the action.
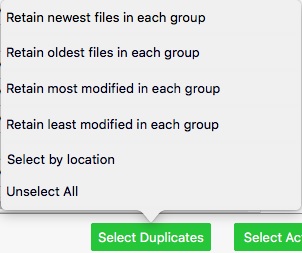
Choose which kind of duplicates you want to retain
- The final step requires choosing between permanently deleting the duplicates and backing up the duplicates to a folder, from the Select Action button.
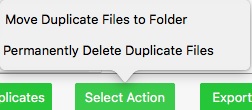
The final step in cleaning up the duplicates

Warning: Undefined array key "author_box_bio_source" in /home1/clonefil/public_html/blog/wp-content/plugins/molongui-authorship/views/author-box/parts/html-bio.php on line 2
Raza Ali Kazmi works as an editor and technology content writer at Sorcim Technologies (Pvt) Ltd. He loves to pen down articles on a wide array of technology related topics and has also been diligently testing software solutions on Windows & Mac platforms. If you have any question about the content, you can message me or the company's support team.