The VLC media player can virtually play any media format available in the market. It’s flexibility and easy-to-use interface means it is easily the market leader in the category of media player out there. However, due to various circumstances, it sometimes might not perform well as it supposed to be. This tutorial helps out users on dealing with the VLC media player lagging issue.
Solutions
Solution 1: Update The VLC Player to The Latest One
As you might have guessed, updating VLC media player to the latest one helps to solve virtually any problem that exists in the player save for any programming issues. Updating it is simple and the most effective solution. And it can be done all in the blink of an eye.
- Visit the following URL: http://www.videolan.org/vlc/index.html
- Click on Download VLC to start downloading VLC media player. If you want to download the player for another platform such as Android, Mac OS or Linux, click the down arrow, and select the relevant platform to begin the download.
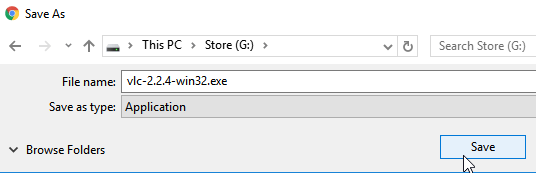
- Save the file in the hard drive as seen in the following screenshot.
- Double-click on the executable file to start installing the VLC player. If you already have the VLC player installed in the system, this will simply update the existing player to the latest one.
Solution 2: Enable The Hardware Accelerator
Hardware accelerator is a new feature which allows VLC media player to transfer some of its load onto the Graphics Card to improve the overall performance. Please note that this method might not work out across all computer systems, particularly if the Graphics Card is old or outdated.
- Open the start menu.
- Search for dxdiag. Open it from the Search Results.
- Switch to the Display tab.
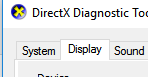
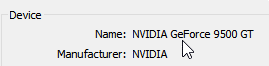
- Locate the currently active Graphics Card’s name and note it down.
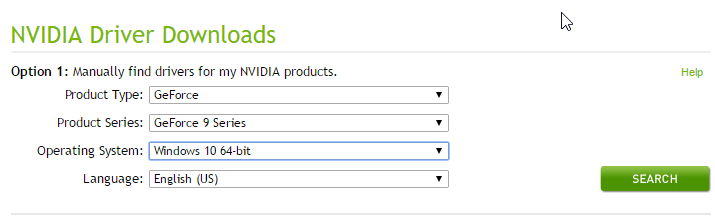
- Search for its driver in Google.
- Now download the driver.
- Open VLC media player.
- Click on Tools | Preferences.
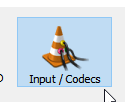
- Switch to Input / Codecs.
- Select Automatic from the Hardware-accelerated decoding drop-down menu. If it’s not enabled, switch to DirectX, but it’s recommended to keep the automatic setting as this basically means VLC media player will automatically determine the best method for playing videos.

Select Automatic from the drop-down menu - Click Save to save the changes and close the window.


Solution 3: Reduce The Video Quality to A Lower Value
If you have a beefy Processor and can spare a lot of CPU power for videos, then turn this setting to the maximum possible value which at the moment is 6. Increasing the value dramatically improves the video quality, whilst reducing the performance. If you have a lower end system, or if you experience the lag or stutter problem, then either disable it altogether or lower its value.
- Launch VLC media player.
- Press Ctrl + P to open the Simple Preferences window.
- Switch to Input / Codecs.
- Change the Video quality post-processing level to a desired value. Set it to 0 to disable it altogether.

Set the desired value - Click Save.

Solution 4: Increase The Caching Time
If you are broadcasting a media file over the Internet, then increasing the Caching value reduces the lags while the media file is being played. What this option actually stands for is that it periodically accesses the medium where the media file is stored and then retrieve its data. Next, it then loads them onto the RAM, and then passes on the retrieved data to the other side where it is being played.
- Open VLC media player.
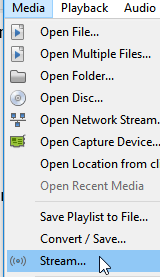
- Click on Media | Stream.
- Select the appropriate medium where the media file resides. As an example, if the media file is being played from the local hard drive, you need to select File, if it resides in a disk, select Disc. If it is being retrieved from another network, then select Network, and finally if the media is being captured from a streaming session, select Capture Device.
- Locate Caching and increase its value accordingly. The recommended value is anything over 1s, meaning 1000ms.


Warning: Undefined array key "author_box_bio_source" in /home1/clonefil/public_html/blog/wp-content/plugins/molongui-authorship/views/author-box/parts/html-bio.php on line 2
Raza Ali Kazmi works as an editor and technology content writer at Sorcim Technologies (Pvt) Ltd. He loves to pen down articles on a wide array of technology related topics and has also been diligently testing software solutions on Windows & Mac platforms. If you have any question about the content, you can message me or the company's support team.