Adobe Cloud, which allows you to store files in the cloud (on Adobe servers), is the latest addition to the Adobe Creative Cloud suite. Like with any other software, users often encounter the duplicate files issue that leads to a significant wastage of hard drive space over a period of time. Therefore, this tutorial teaches how to remove such duplicate files and recover invaluable space for more pressing needs.
Enter Clone Files Checker, and you can be assured of forgetting about any duplicates that might be clogging your Adobe Cloud account. This is a very comprehensive software program and performs its job with remarkable accuracy.


Clone Files Checker for Windows and Mac is a verified software
Compatible with Windows 10/ 8.1/ 8/ 7 and Mac OS 10.10 onwards
By clicking to download, you agree to these Terms
See Windows Features | Mac Features
Solutions
Solution 1: Removing Multiple Creative Cloud Folders
The cloud store can be accessed with the Creative Cloud Desktop App. It frequently updates itself in order to make use of the latest updates rolled out by Adobe. Adobe Creative Cloud’s version 1.9.1.474 contains a bug which causes the app to create multiple copies of the Creative Cloud Files folder where the files are stored. Once the cloned copy is created, it syncs the contents in it just as the original folder, hence resulting in a wastage of space in the local system, the creative cloud (20GB space is provided by default) and the bandwidth. Let us see how to tackle this issue.
- Launch the Adobe Creative Cloud app.
- Upon initializing, it will notify you about a new update available to the Creative Cloud Desktop App, provided you’re signed in with your Adobe user credentials. Otherwise, you will have to visit this site and create an account for accessing all Adobe products:
https://accounts.adobe.com/
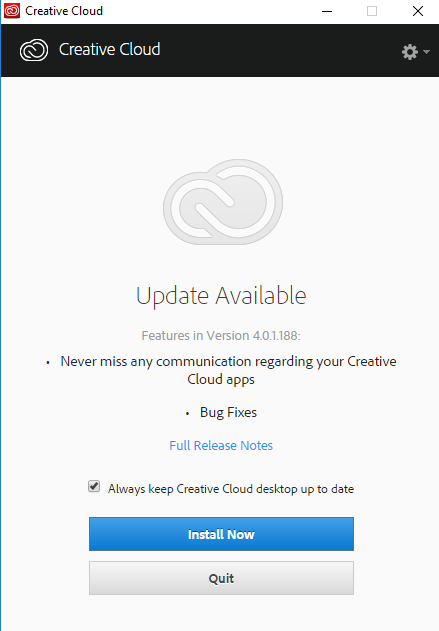
- Once you log-in, the following window will appear. Select the check mark just before the Always keep Creative Cloud desktop up to date option and then click on Install Now.
- Patiently wait for the update installation to conclude successfully.
- Now navigate to C:\Users\%userprofile% and locate the Creative Cloud Files folder and its cloned folder(s). The word unknown would be appended to the cloned folder, which has been created as a result of the bug.
- Simply delete the Creative Cloud Files (unknown) folder.
Solution 2: Remove Duplicate Files from the Creative Cloud Files Folder
Another method to free up all those volumes of hard disk space lost to duplicates is to use Clone Files Checker to scan and weed out all the dupes in the Creative Cloud Files folder. The contents of this folder might be linked to one or several projects of Adobe Creative Cloud suite (except certain Adobe products e.g. Photoshop which embeds the files in its project file unless Linked Smart Objects are used), and for this reason it’s not really recommended to remove them unless they are unlinked prior to their removal. So you should go through each project, unlink the files and use common files for all the projects. For removing duplicates files, follow the steps given below.
- Open Clone Files Checker.
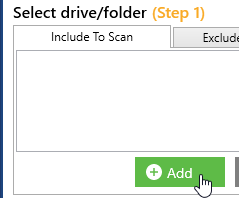
- Click Add to browse and add the folder to be scanned for duplicate files.
- Select Creative Cloud Files folder from C:\Users\%userprofile%.
- Select All Files in the next step.
- Now click on Start Search to initiate the scan for duplicate files.

Launch the scan by clicking Start Search - Once the scan is over, select Review & Fix.
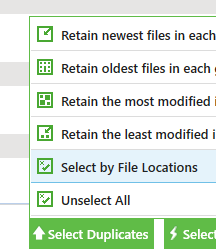
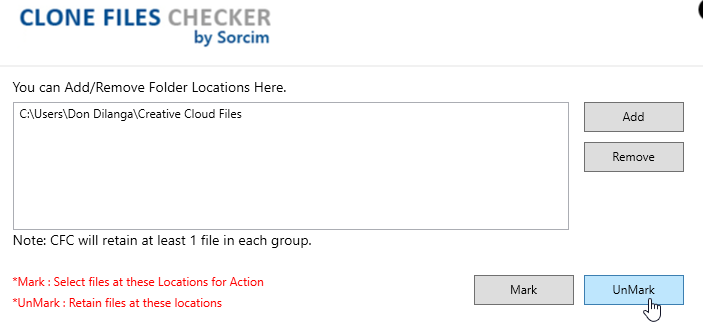
- Click Select Duplicate as shown in the screenshot below and then select the Select by File Locations option.
- Click on Add.
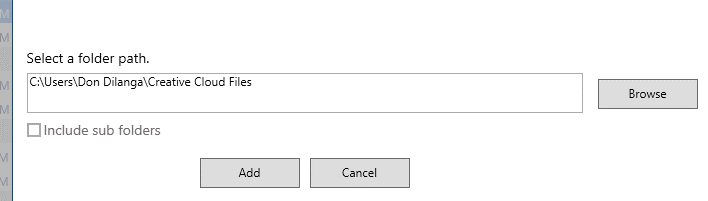
- This tutorial presumes that the common files which are shared across all the projects of Adobe products are placed in the Creative Cloud Files folder. Therefore select it, and then click on Add. Make sure that the Include sub folders check box isn’t selected.
Adding up the ‘exception’ folder - Now click on Unmark to exclude the folder you just added in the last step from any action that will be performed by Clone Files Checker shortly.
- Click Select Action.
- Finally, select Permanent Delete to kickstart the removal of duplicate files from the Creative Cloud Files folder.

Warning: Undefined array key "author_box_bio_source" in /home1/clonefil/public_html/blog/wp-content/plugins/molongui-authorship/views/author-box/parts/html-bio.php on line 2
Raza Ali Kazmi works as an editor and technology content writer at Sorcim Technologies (Pvt) Ltd. He loves to pen down articles on a wide array of technology related topics and has also been diligently testing software solutions on Windows & Mac platforms. If you have any question about the content, you can message me or the company's support team.