Are you tired of renaming each and every excel file on your OneDrive manually? We have the solution to your problems. Now you can easily rename all those excel files in a go without having to select every file manually and spending so much time. Our lives are very fast-paced, and we need swift solutions to the problems we face.
Cloud File Renamer helps you rename all your files with a few mouse clicks. It helps save up a lot of time and ensures accuracy at the same time.
Read below how Cloud File Renamer can be your savior:
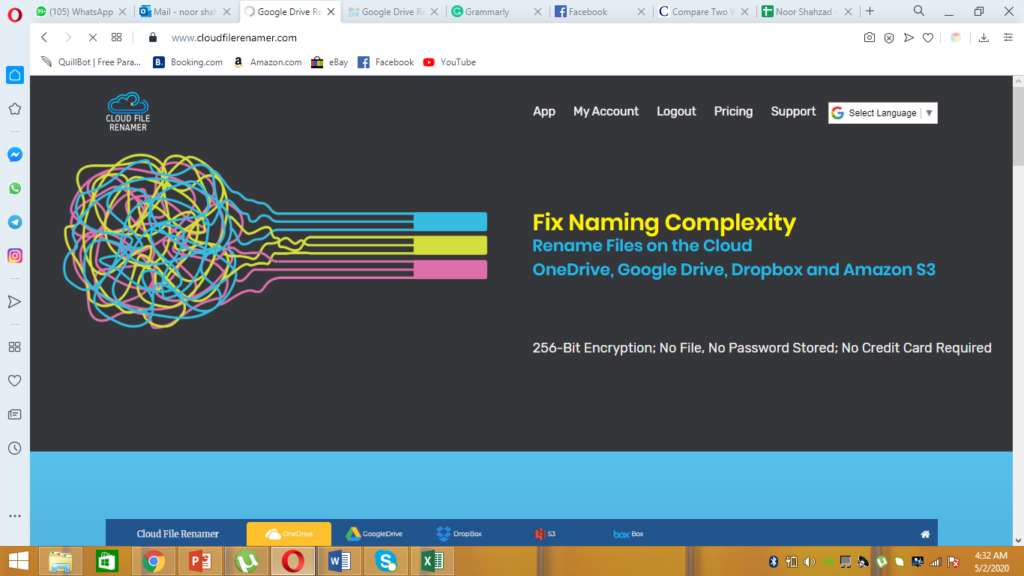
What is Cloud File Renamer?
Cloud File Renamer is a leading web-app you can use for renaming bulk files anytime, anywhere. Thousands of people use this top-notch software to keep their files organized without having to put in any extra effort. You can rename files on OneDrive, Google Drive, Dropbox, and Amazon S3 using CFR. It offers 12 exciting renaming rules to choose from. You can play even smart and apply a mixture of multiple rules in a single go.
Doesn’t it sound interesting? Let’s read below to find out how you can rename your files using Cloud File Renamer.
Step 1
The very first step is to log on to https://www.cloudfilerenamer.com. Here you will have to sign up for an account. You can sign up with your Microsoft or Google account for a quick sign up job, or use the Create an Account button to manually fillup the form.
Now that you have signed up, navigate to the Pricing page and subscribe to a membership plan of your choice.
Step 2
Now back to the App area, where you will see four cloud options on the top of the screen. They will be OneDrive, Google Drive, Dropbox, and Amazon S3. Since you want to rename Excel files in OneDrive, click the OneDrive tab and then click on Add New Drive.
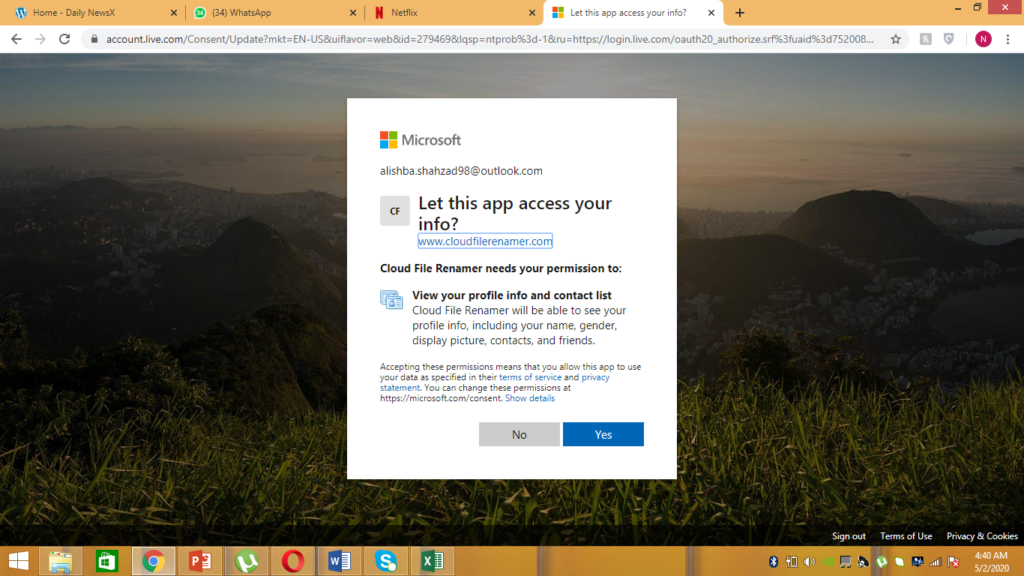
You will now be required to enter your Microsoft account credentials and give your consent to CFR accessing your OneDrive data. Don’t worry about data safety at all, because CFR will access your data through the official OneDrive API, which ensures data safety at all levels.
Step 3
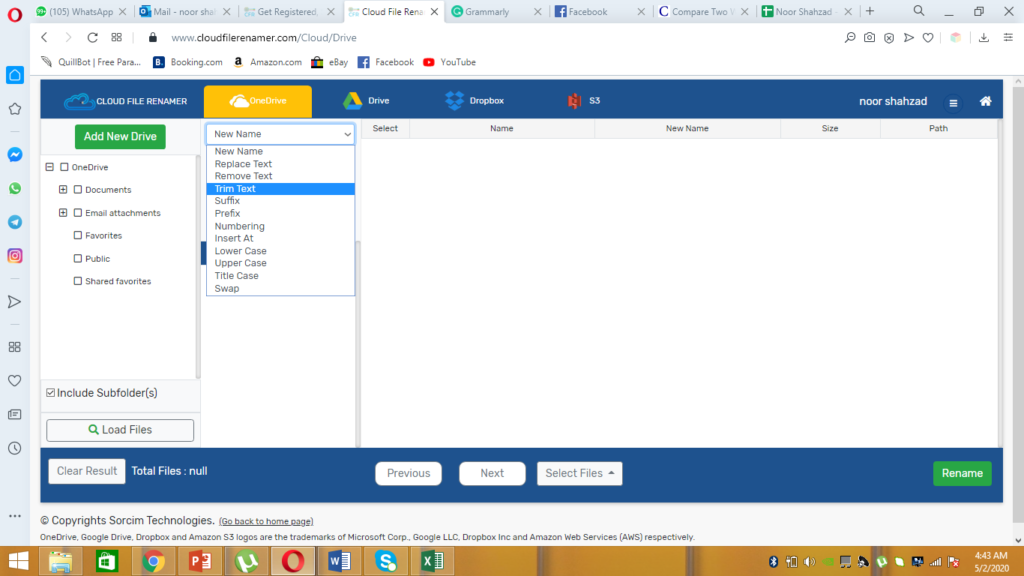
After you have provided the permissions, you will notice your OneDrive folder directory populate the pane on the left (just below the Add New Drive button). Now click the folder(s) which contain excel files you want to rename and then click Load Files. The files will now be listed out in the main area (just next to the renaming rules). You can select the files either manually or via the Select Files button.
Step 4
Select the rules you want to apply, enter the required text, select the options and click Add Rule. This is what happens in this step. Let’s take a brief look at each rule.
- New Name: With this rule, you can give a totally new name to the file.
- Remove Text: With this rule, you can eliminate a single/ several characters (or words) from the filename. You can also choose if you want the first, last, or all instances of the text you entered have to be removed. You can even opt to have the case ignored.
- Replace Text: You can replace text using this rule. All the remaining options of this rule are the exact same of the Remove Text rule.
- Trim Text: This rule helps to trim the text (by the number of characters) at either the start or the end of the filename.
- Prefix: With this rule, you can add a prefix to the filename.
- Suffix: With this rule, you can add a suffix to the filename.
- Numbering: You can start numbering the files in ascending order using this rule. You can choose if you want the numbering to be added as a prefix or a suffix, and also have to choose between a hyphen or the underscore sign to be added along with the numbers.
- Insert At: With this rule, you can add text at specific places of the filename.
- Lowercase: You can convert all your file names into lowercase titles.
- Uppercase: With this feature, you can easily change the name of the excel file to all uppercase letters.
- Title Case: With this feature, you can easily change the name of the excel file to all uppercase letters.
- Swap: This rule allows you to swap the names on the either side of the identifier, based on the occurrences you specify.
Step 5
Once you have added all the rules, take a peek at the New Name column. When everything feels good, click the Rename button to start the rename operation.
Cloud File Renamer is very easy-to-use and is the way to go when you want to rename excel files in bulk on your OneDrive account. It will not just make your work easier, saving time, but will also eliminate the chances of any errors.

Warning: Undefined array key "author_box_bio_source" in /home1/clonefil/public_html/blog/wp-content/plugins/molongui-authorship/views/author-box/parts/html-bio.php on line 2
Raza Ali Kazmi works as an editor and technology content writer at Sorcim Technologies (Pvt) Ltd. He loves to pen down articles on a wide array of technology related topics and has also been diligently testing software solutions on Windows & Mac platforms. If you have any question about the content, you can message me or the company's support team.