No matter how many articles are written, one will never be able to entirely cover all the issues people face while using Windows 10. This is not meant to suggest that Windows 10 is very error-prone, but speaking on realistic terms errors and bugs do creep up in a software that is as complex and as massive as the latest installment of the Windows franchise is.
Problems related to Windows are often attributed to the activities of the end-user and/or third-party apps, otherwise, Windows itself is normally stable as it’s subjected to regular updates directly by Microsoft. This article aims to discuss one such minor issue – Restore Points automatically get deleted, which usually occurs in low budget computers.
Solutions
Solution1: Make Sure the System Protection Is On
Certain third-party applications or user activities might disable System Protection and thus the Restore Points might get deleted. Make sure system protection is turned on, and nothing interferes with its functionality.
- Click on the start button to open the start menu.
- Right-click on File Explorer. Now hover over to select More and finally click Properties.
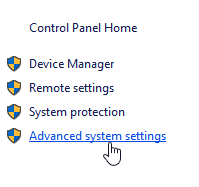
- Click Advanced system settings.
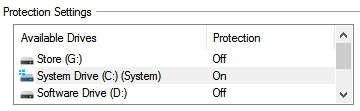
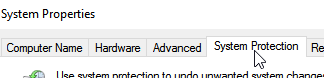
- Switch to the System Protection tab.
- Select to highlight the System Drive.
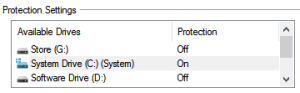
Select the System Drive - Click on the Configure button.
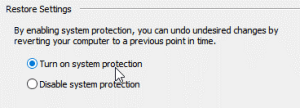
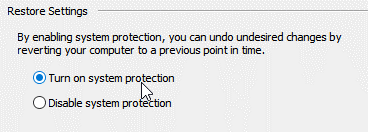
- Click Turn on system protection to activate the creation of System Restore Points.
Solution 2: Increase The Free Space in The System Drive
Windows 10 contains an inbuilt mechanism that disables the automatic creation of Restore Points, if the system drive runs out of space. This will be re-enabled on its own as soon as sufficient disk space becomes available in the system drive. Make sure that your system drive has at least 2GB of free space at all times. The following guide will teach you how to clean up the system drive to recover more free space out of it.
- Open the start menu.
- Search for Disk Cleanup and open it.
- Select the system drive.
- Now click Clean up system files.
- Select all the checkboxes in the following panel.
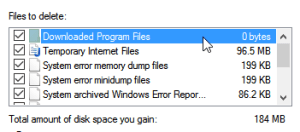
Select all the checkboxes - Click OK to initiate the cleanup process.

Solution 3: Reduce The Disk Space Usage
As the following screenshot’s description states, when Restore Points are created they eat up a certain portion of the space in the system drive. Since they are created on a frequent basis, the free space in the system drive drastically decreases over time. Once the free space for the Restore Points is no longer available, the older ones automatically get replaced by the newer ones.
- Follow Solution 1 until step # 7.
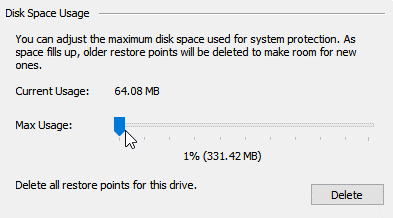
- Increase the Max Usage to a desirable level, but make sure it doesn’t consume such a high amount of space that it affects the computer’s routine operations, because Restore Points don’t require high amounts of disk space.
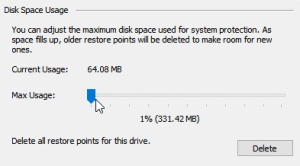
Specify Disk Space for Restore Points
Solution 4: Beware of Cleaning Software
Certain disk cleaning utilities like CCleaner might end up deleting System Restore Points to save disk space. Similarly, Windows’s default disk cleanup utility might also delete Restore Points if the Clean up system files button is clicked. Therefore, avoid doing so unless it is absolutely necessary to do so.

Warning: Undefined array key "author_box_bio_source" in /home1/clonefil/public_html/blog/wp-content/plugins/molongui-authorship/views/author-box/parts/html-bio.php on line 2
Raza Ali Kazmi works as an editor and technology content writer at Sorcim Technologies (Pvt) Ltd. He loves to pen down articles on a wide array of technology related topics and has also been diligently testing software solutions on Windows & Mac platforms. If you have any question about the content, you can message me or the company's support team.