When you want to transfer photos from your Android smartphone to your computer, you have a choice of three methods to choose from. You can either use a USB cable, a cloud file storage platform like Google Drive or a Wi-Fi file transfer app.
If your USB cable offers low or average transfer speed, we recommend you skip over to the Wireless Methods section.
A. Wired Methods
Before You Begin
In order to transfer files from your phone, you will need to go to the Developers Options section and make sure that the USB debugging feature is turned On. A USB cable is also required, of course! Some steps might vary depending on your smartphone and OS version.
Open up your phone’s Settings section.
Scroll down to About Device.
Now tap Software Information, followed by Build Number.
This will open the Developer Options screen. If it doesn’t, tap Build Number at least 7 times.
Select USB Debugging.
Make sure that the following feature is turned ON:
Always allow for this computer to be turned on.
Tap OK.
Now whenever you connect your phone to your computer, you will be asked to establish a new connection. Simply select the Media Device (MTP) option and then tap Allow.
Note: The USB Debugging feature provides anyone with access to your smartphone’s data using a USB cable. It is recommended that you turn this feature off right after use to avoid data loss.
Method 1: Using AutoPlay Dialog
The AutoPlay prompt appears whenever you connect a new device to your computer. As soon as you connect your phone to your PC, the AutoPlay prompt asks you to automatically import your photos.
In order to use AutoPlay, you will need to first turn it on from your computer’s settings as follows:
Click the Start button and then select Settings.
Click on Devices.
Set the AutoPlay feature to ON.
Connect your phone to your computer and wait for the AutoPlay dialog to load.
Click the Import pictures and videos option. The automatic transfer process should now begin.
Method 2: Using the Photos App (Windows 10 Only)
Windows 10 operating system comes with the Photos app that makes it pretty easy and fun to organize thousands of photos stored on your PC. In addition to file management, it also allows you to automatically build a library of all photos stored on your Android device. This is the easiest way to get your photos in a moment.
Follow these steps given below:
Connect your Android smartphone to your PC via the USB cable.
Click the Start button, select Apps, followed by Photos.
Locate the Import icon on the upper-right corner of the Photos app.
The Device Selection dialog will now appear on the screen. Select your smartphone from the list.
The Photos app will display a preview of all the photos found on your device. They should be already selected. If not, click on Select All. Alternatively, you can select custom photos of your choice using the checkboxes.
Click on Continue.
The import process should now initialize and get over pretty soon.
Method 3: Using File Explorer
With File Explorer, you can browse through different folders, subfolders of your phone and copy the photos individually.
Connect your Android phone to your computer.
When the AutoPlay dialog opens, select Open device to view files. If Autoplay doesn’t appear, just double-click This PC and then double-click the drive indicating a phone icon.
Your photos should be found under the DCIM sub-folder. If you can’t find this folder, use the Search box on the top-right corner and type DCIM.
You can select all photos using the Ctrl + A shortcut. You can also select multiple photos in a sequence of your choice by using different keyboard shortcuts. For instance, the Shift key (and left mouse click) should allow you to select files in a sequence while the Ctrl key (and left mouse click) should allow selecting files that are not in the same row.
Once you’re done selecting the photos, copy them all to a folder of your choice.
B. Wireless Methods
Method 1: Using Google Drive
Google Drive is a cloud storage app that lets you organize data and share it with your colleagues. If you have multiple devices at home and workplace, you can synchronize the stuff without having to intervene using Google Backup and Sync. In addition to automatic online backups, Google Drive contains a set of cloud-based Office apps that allow you to create & edit documents, presentations, worksheets straight from your browser.
We will use Google Drive to transfer your photos and search them for duplication. Here’s how:
Make sure you’re connected to Wi-Fi instead of your mobile’s data connection.
Download the Google Drive app on your smartphone from the PlayStore.
Launch Google Drive and sign in to your account. If you don’t have, create one.
Tap the Plus sign icon (+) on the bottom right, and then select the Upload option.
Choose your Gallery folder and select all the photos which you wish to upload. This might take some time depending on your file size.
Open Google Drive from your computer and you should be able to view and download your photos with ease.
Method 2: Using ShareIt
Some third-party Android apps offer you the ability to transfer photos wirelessly. One such popular app is called ShareIt.
ShareIt is a high-transfer data sharing app that builds access points using your existing Wi-Fi connection for seamless data transfer. ShareIt promises 200 times faster speed than the traditional Bluetooth method. As a cross-platform app, it is available on both Android and Windows PC.
Scan Transferred Photos for Duplicates
Once you have transferred the photos, it’s time to check them for duplication. Clone Files Checker, an algorithm based software utility, can find thousands of duplicates in a span of a few minutes. To search for duplicates using CFC, follow the steps given below:
If your photos are located on your computer’s hard disk, click the System Scan tab. Click the Add button, and select the directory that contains your photos. Similarly, you can define the folders you do not wish to scan through the Exclude from scan option.
If your photos are located on Google Drive, select the Cloud Scan tab, followed by Google Drive. CFC will prompt you to load the drive. Upon clicking the Load Drive button, you will be asked to provide your Google Drive login credentials. Remember that CFC uses official APIs from the respective cloud providers, hence your data is safe and typing your login credentials shouldn’t be an issue.
Now, you can configure additional options to choose file filters instead of the default All Files option. File filters are nothing but specific file types you choose to scan. For example, Videos. One downside of selecting custom file types is that it limits the scope of your scan. As a result, you find a lesser number of files.
In the case of System Scan, you can also define file size limits in KB, MB and GB. The upper and lower filters are very useful to get rid of results you don’t actually need.
Hit Start Search and the scan will spring into action.
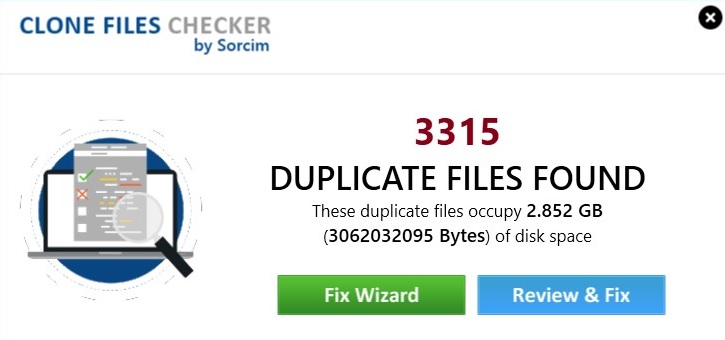
Once the results are displayed, click the Review & Fix button.
Now use the Select Duplicates button to choose redundant copies.
Click Select Action, and choose between Move to folder and Delete Permanently.
Why Clone Files Checker?
The in-house backup feature helps against unexpected data loss. Just head over to the History tab and you will find the scan history. CFC compresses the contents to minimize the storage space being utilized.
Fix Wizard: Clone Files Checker offers a simple and easy way to get rid of duplicates with just a few clicks.
Export your duplicate scan result to a comma-separated values file. You can share this file with your coworker for reference.
Facilitates file search, music search, iTunes search in addition to cloud search that supports major cloud servicing platforms such as OneDrive, Google Drive, and Dropbox.
Tweak the program settings and add or remove file extensions to search.
The in-house preview functionality allows you to view the content of your images and videos without having to separately open the file externally.
CFC does not force you to delete duplicates. If you want, you may choose to move them to some other directory via the Move to folder option.
The Music Search is powered with algorithms to compare music files for different tags. Select artist, file content, album and other types of tags you want CFC to take into consideration for identifying duplicates.
Clone Files Checker is super fast, easy and assures 100% accuracy of the results, all thanks to the powerful scan algorithms and usage of advanced technology.
Warning: Undefined array key "author_box_bio_source" in /home1/clonefil/public_html/blog/wp-content/plugins/molongui-authorship/views/author-box/parts/html-bio.php on line 2
Raza Ali Kazmi works as an editor and technology content writer at Sorcim Technologies (Pvt) Ltd. He loves to pen down articles on a wide array of technology related topics and has also been diligently testing software solutions on Windows & Mac platforms. If you have any question about the content, you can message me or the company's support team.
Clone Files Checker utilizes industry-approved cookie tracking technologies. We want to take you into confidence that your privacy is never compromised. AcceptRejectRead More
Privacy & Cookies Policy
Privacy Overview
This website uses cookies to improve your experience while you navigate through the website. Out of these, the cookies that are categorized as necessary are stored on your browser as they are essential for the working of basic functionalities of the website. We also use third-party cookies that help us analyze and understand how you use this website. These cookies will be stored in your browser only with your consent. You also have the option to opt-out of these cookies. But opting out of some of these cookies may affect your browsing experience.
Necessary cookies are absolutely essential for the website to function properly. This category only includes cookies that ensures basic functionalities and security features of the website. These cookies do not store any personal information.
Any cookies that may not be particularly necessary for the website to function and is used specifically to collect user personal data via analytics, ads, other embedded contents are termed as non-necessary cookies. It is mandatory to procure user consent prior to running these cookies on your website.