Important Announcement
On March 1 2019, our company, Sorcim Technologies, has launched the Cloud Duplicate Finder (CDF) web-service. The CDF finds duplicate files, photos, music and documents from Google Drive 100% online, there is no need to download files to your computer or macOS. You can use the web-app even on your tablet or a smartphone. If you’re looking to clean up duplicate files from up your Google Drive cloud storage, create an account on CloudDuplicateFinder & Delete Google Drive Duplicates in minutes. This service applies 256-bit AES encryption; it is made using the official APIs from Google, Microsoft, Dropbox and Box, and it never stores or sees your files and passwords. Your privacy is never compromised!
Perform Operations at Desktop Level?
If you are still looking to perform operations at the desktop level, please follow our guide below. It involves manual steps and the automatic cleaning through our desktop software, Clone Files Checker.
Google is known to be a tech mogul which has always been enriching the world of technology courtesy it’s extremely innovative and popular contributions. A select few of the well-known examples can be Google Drive and Photos both of which contribute to help back up data in the cloud. Data stored on the cloud serves as a center of attention among multiple devices.
Recently Google merged these popular services and named the resultant service as Backup and Sync, while still retaining them separately at the server’s end. The purpose of the merger is to allow users to access Google Cloud through a single interface in a simple and convenient manner. Various other handy features have also been bundled with the application, which is free for Google users, just like all other Google services are. However, the storage quota is limited, so users must be very diligent in utilizing it. If you suspect there are any duplicates in your Google Drive, look no further than Clone Files Checker.
Clone Files Checker for Windows and Mac is a verified software
Compatible with Windows 10/ 8.1/ 8/ 7 and Mac OS 10.10 onwards
By clicking to download, you agree to these Terms
See Windows Features | Mac Features
Features Available in Backup and Sync
- Ability to backup multiple folders rather than being able to backup only a single folder in the computer.
- Smart filtering system filters photos and videos and uploads them to Google Photos.
- Duplicate detection identifies duplicate photos and videos and uploads only a single version of the file to Google Photos, while uploading all of them to Google Drive.
- The older Google Drive folder is still usable through the application which uploads files to My Drive.
- Google Drive maintains separate folders, one for My Drive where backups of Google Drive in the user folder of the computer are stored, while the other one is for Backup and Sync which shows up all the Computers where Backup and Sync application is in use.
- Ability to backup files straightaway upon connecting with an external storage medium such as pen drives, hard drives, SD cards, digital cameras etc. This is quite useful for professional cameramen who want to swiftly back up the captured images by connecting the camera to the computer.
How to Set it up in the Computer and Use it?
The process of setting up Google Backup and Sync is relatively straightforward. Here we’ve broken it down into four separate sections for the reader’s convenience.
Setup the Main Software
- Visit the following URL: https://www.google.com/drive/download/
- Download Backup and Sync application by clicking on the Download Backup and Sync button.
- Once it’s installed in the system, launch it through the start menu.
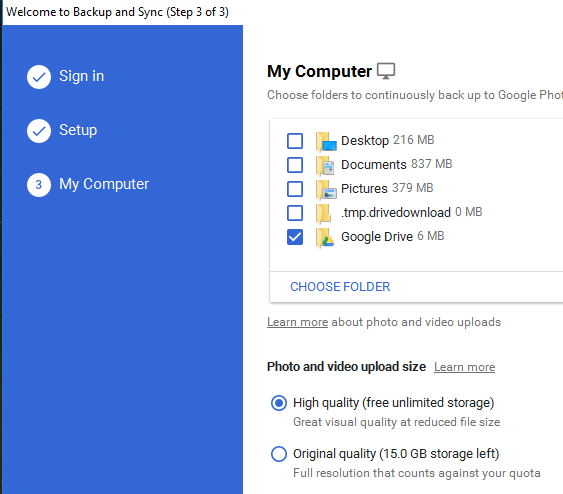
- Click on GET STARTED to initiate the preliminary steps you need to undertake before you can use Backup and Sync.
- Sign in to Google Drive by entering in the credentials of your Gmail account.
- Select between Back up photos and videos and Back up all file types. The latter option is recommended as this way the application provides the user with an option to backup photos and videos to Google Photos as well. This way photos and videos are uploaded to both Google Photos and Google Drive, whereas all other kinds of file types are uploaded only to GDrive. The sole purpose of this option is to cater to legacy users who just want to use Google Photos but they aren’t interested in using Google Drive.
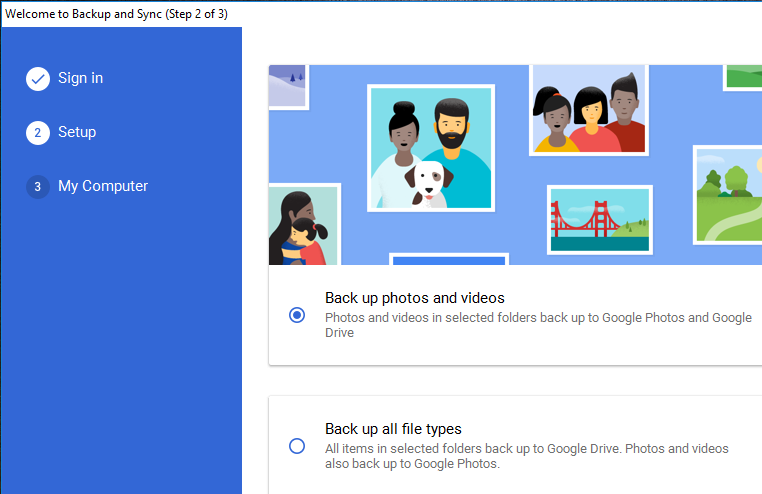
Select your preferred option - Select all the folders that have to be backed up.
- Open the application via its icon in the taskbar and then allow the application to upload the files in the selected folders to the cloud. The upload progress can be tracked by clicking the application icon.
- To see the uploaded files in the cloud, visit https://drive.google.com/drive
- Find the Computers icon in the panel on the left, click it to open the folder hierarchy. Now you will be able to view all the files uploaded from your computer where Backup and Sync is installed and configured.

Setup the My Drive feature
My Drive is the legacy folder which contains all the files synced with Google Drive on the user’s computer. Backup and Sync tool still caters to the legacy user base, so for them, this feature comes in handy in finding data that has already been synced or if they want to continue to use it regardless of other functions provided by the application.
- Open the application and then select Google Drive.
- Now select the checkbox to continue using the legacy Google Drive service which uploads files straightaway to the My Drive folder on the GDrive website.
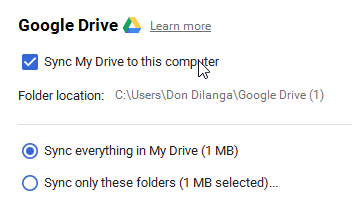
Selecting the checkbox for Sync My Drive to this computer
Setup Mobile Phones, SD Card and Camera Backup
This feature helps to back up photos, videos to Google Drive from any external storage medium.
- Connect an external storage device to your computer.
- Make sure it appears in This PC, as seen in the following screenshot.
- Now wait until Backup and Sync displays the following message. Select BACK UP to initiate the backup process.
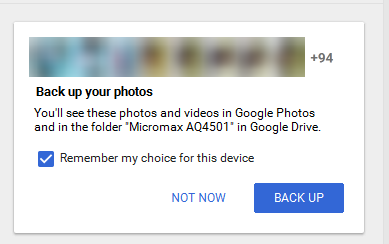
Click BACK UP - If you want to prevent this device from being backed up, go to Preferences -> USB Devices & SD Cards.
- Now you can select/ deselect the checkbox depending on your requirements.

Setup Photos and Videos Back up
Since Google has merged both Photos and Google Drive app together, the people who just want to use the Photos app are unable to do so without Google Drive crossing their path. However, with a couple of clicks Google Drive can be confined to the background.
- Launch the application, click Preferences.
- Now deselect every folder in My Computer and select only Pictures or any other folder where only videos and/ or pictures are stored.
- Select the checkbox for Upload newly added photos and videos to Google Photos.
- Deselect Google Drive as well. This will cause the Sync and Backup tool to only backup pictures and videos.
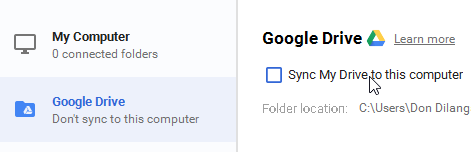
Uncheck the Sync My Drive to this computer checkbox - Visit the following webpage to view all the Videos and Pictures: https://photos.google.com/
How to Remove Duplicate Files?
Removing duplicate files from Google Drive manually is highly tedious and erratic task. However it can be made somewhat easier with the help of Windows PowerShell. The following guide teaches us how to use PowerShell to clean up duplicate files of any type.
- Launch the application and open Preferences.
- Find all the folders added in My Computer, and note their path by hovering the mouse over each of them.
- Now use the following PowerShell script to remove any duplicate files from those directories. Use the same script for each folder, the only change needed is the addition of the extension of all file types in the particular folder after the -include parameter.
Get-ChildItem -path “C:\Users\%userprofile%\Google Drive\Main”* -include *.jpg,*.png -Recurse | Get-FileHash | Group-Object -Property hash |
Where {
$_.Count -gt 1
} | % {
$_.Group | Sort-Object $_.Name | Select-Object -skip 1
} | Remove-Item
How to Use Clone Files Checker to Remove Duplicate Files?
With Clone Files Checker, removing duplicate files is a walk in the park. Even though the native feature, namely Cloud Scan isn’t much of a use over here, there is a workaround to achieve the said objective.
- Download and install Clones Files Checker by executing the setup file.
- Now add the relevant Sync and Backup folders to Clone Files Checker. Use the mouse cursor to hover above the folders added in My Computer to see their locations, and then use the Add button in Clones Files Checker to add those folders to its interface.

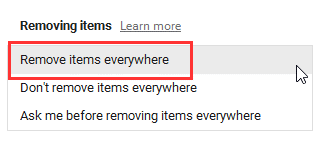
Adding the relevant folders to the target folders area - Make sure the highlighted option is selected in Backup and Sync tool. It basically removes the files from the cloud courtesy syncing as soon as they are deleted at the client’s end. Selecting this option is highly recommended.
- Now click on Start Search. If necessary, select the checkboxes to filter out files by their type and/ or size.
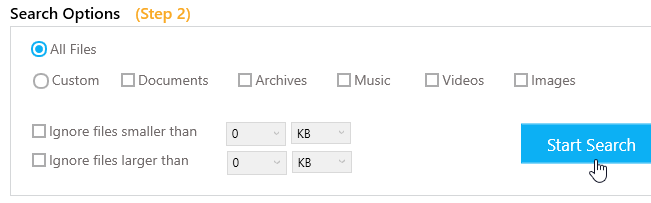
Click Start Search after applying optional filters - Once the scan is over, click on Fix Wizard.
- Select between retaining Newest or Oldest files.
- Click the Permanent Delete button.
- Select Continue to finally remove the duplicate files.
- Wait for the following dialog box to appear on the screen.
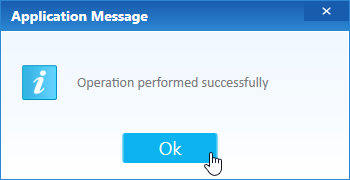
Duplicate cleanup concluded successfully - Now the Sync and Backup tool will spring into action to sync up all the changes to the cloud. Once the sync process gets completed successfully, all the duplicates will be removed from the cloud just as they have been removed from the local system.

Warning: Undefined array key "author_box_bio_source" in /home1/clonefil/public_html/blog/wp-content/plugins/molongui-authorship/views/author-box/parts/html-bio.php on line 2
Raza Ali Kazmi works as an editor and technology content writer at Sorcim Technologies (Pvt) Ltd. He loves to pen down articles on a wide array of technology related topics and has also been diligently testing software solutions on Windows & Mac platforms. If you have any question about the content, you can message me or the company's support team.